Protect your routes from intruders in Vue

Authentication is crucial in a lot of web apps, as it’s what makes it possible to limit content to some users. For example, if your bank doesn’t handle it properly, anyone could be able to see your bank account data!
Goal
The main goal of this article is to show the recommended way to handle routes authorization in vue using vue-router. Although vue-router’s documentation covers this, I thought it would be great to have it all in one place with some simple and understandable code examples.
Let’s get into it
Only care about the code? Check the github repo
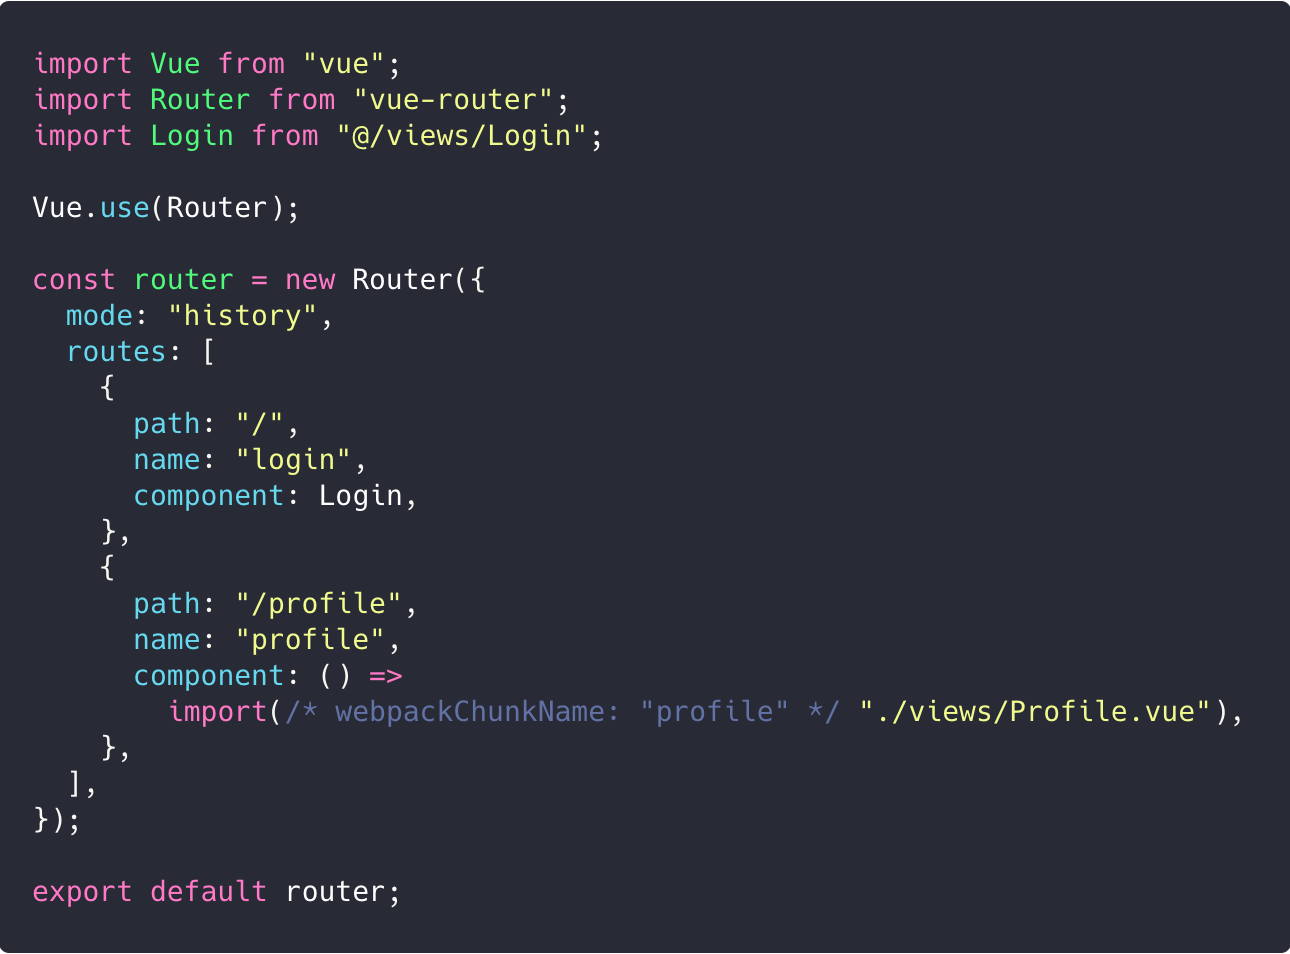
In order to show how this works, we are going to need at least two routes, one that requires authentication and one that doesn’t. Let’s start by creating a simple router.js file with two routes: Log in and Profile.
Nice, we have our routes. But we only want to allow authorized — logged in — users to access the Profile, right?
And luckily for us, Vue Router provides navigation guards for these cases! These guards allow us to either redirect or cancel navigation, and they can be injected (in the navigation process) in three different ways.
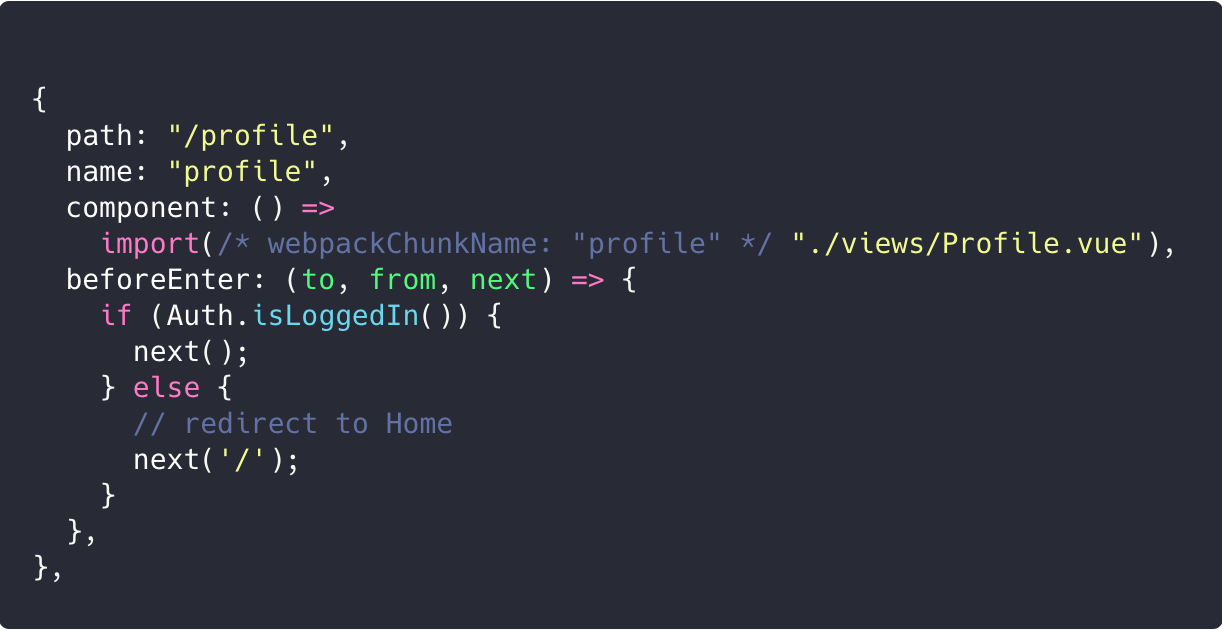
For all of them, we need to add a similar function beforeEach(global guards),beforeEnter(single routes guards) and beforeRouteEnter (component guards). Let’s use beforeEach as an example, but bear in mind that they all work the same way and the only difference between them is where to define them.

So, all of them receive the same three parameters. Let’s go through all of them:
to|Route: the route being navigated to.from|Route: the current route.next|Function: this function resolves the hook.
How to use them
Use in a single route
In order to use this guard in a single route, we need to define beforeEnter directly on that route:
But… what if we have a lot of restricted routes? Do we need to add the same guard with the same code on all of them? No! We can use a global guard for that!
Use globally
To use the guard globally, we just have to register them by using router.beforeEach. This guard will be triggered on every navigation.
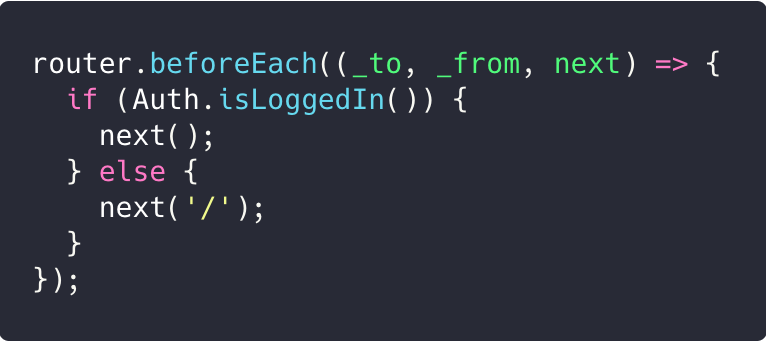
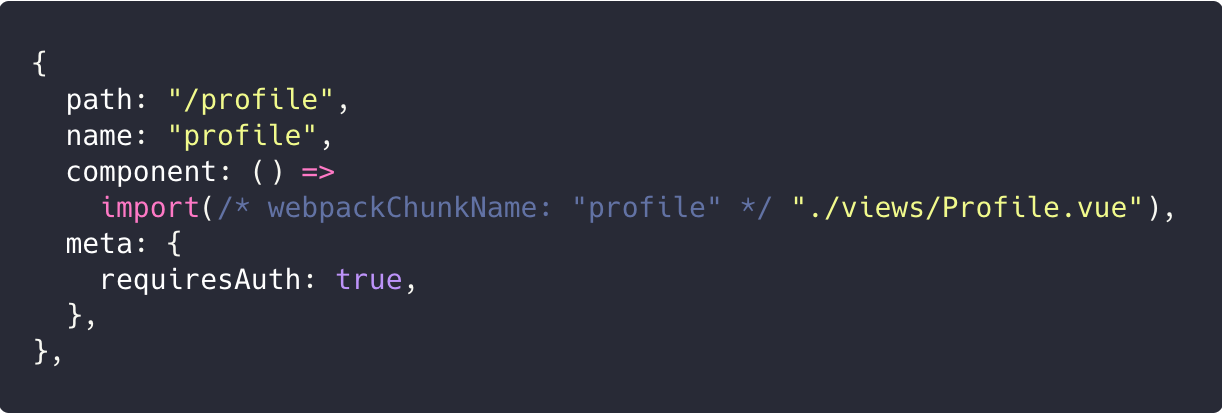
Great, this looks neat! But this code will restrict every route 🤔 In order to restrict only certain routes (only Profile in our example), we can use the meta field of the routes:
Now, on the global guard, we check if the route meta.requiresAuth field is true and, if it is, we check if the user is authorized.
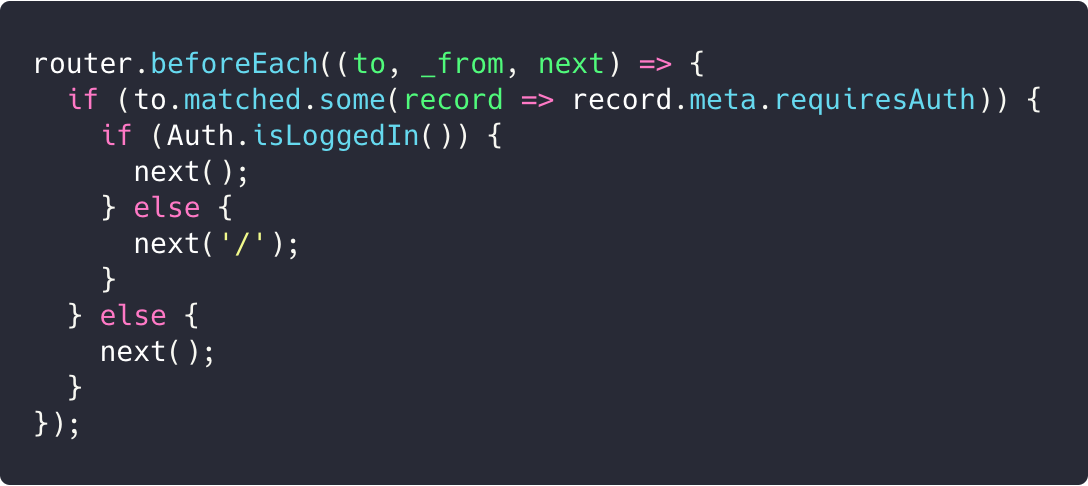
And that’s it! In a few lines of code, we can easily set up authorization to any or all routes!
Look at the complete example here and drop a ⭐ if it was useful for you!
Suggest:
☞ JavaScript Programming Tutorial Full Course for Beginners
☞ Learn JavaScript - Become a Zero to Hero
☞ E-Commerce JavaScript Tutorial - Shopping Cart from Scratch
