Creating Schedulr, a Drag and Drop React Day Planner

Schedulr: Github Frontend, Github Backend | Live Demo
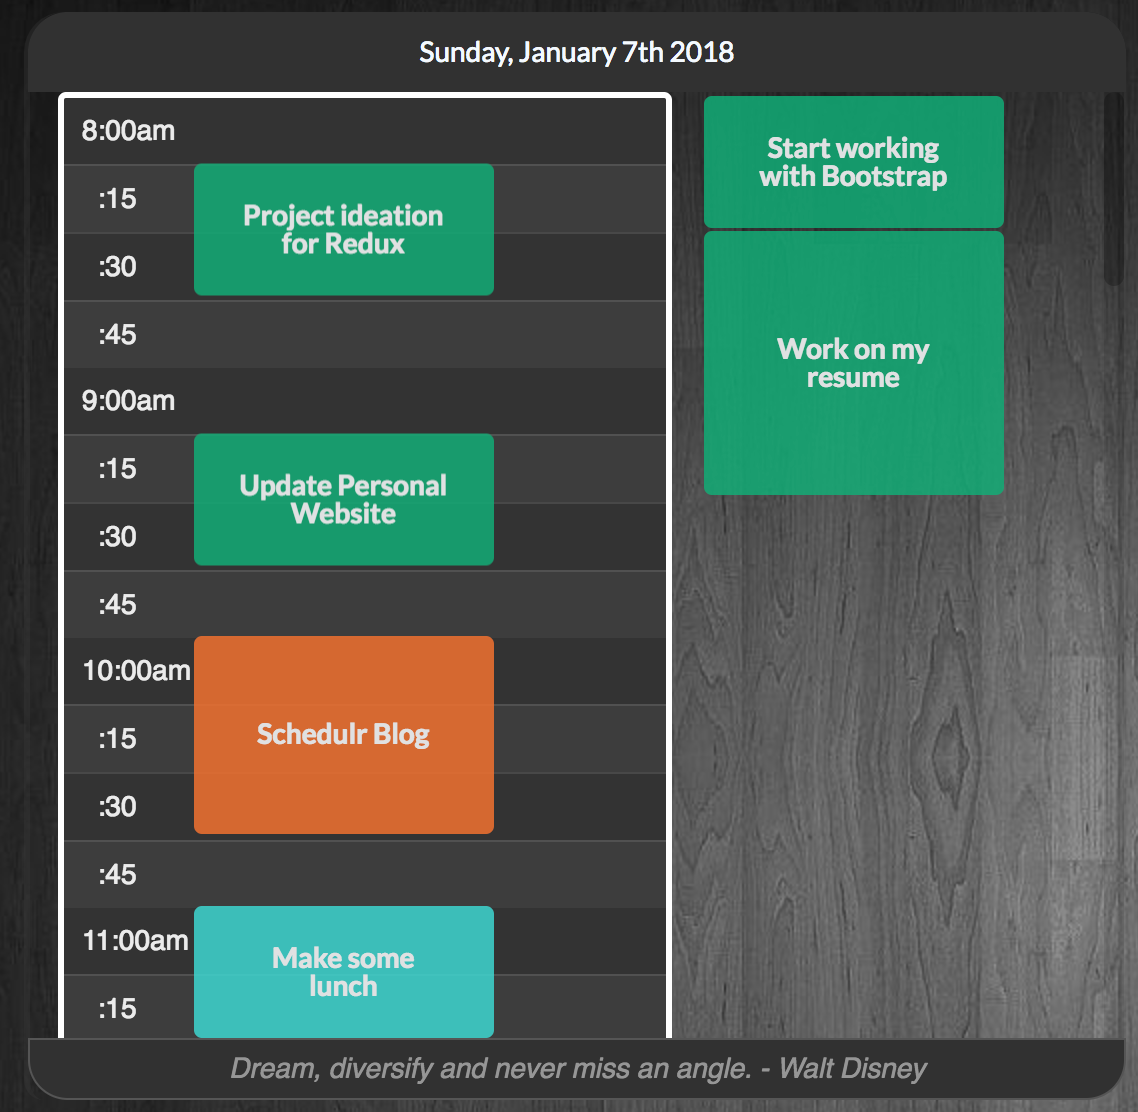
I recently put together my first solo full-stack web app, Schedulr. Schedulr is a day planning app designed specifically around the way that I plan out my days. When I wake up, I create a list of the things I have to do and the amount of time I think they’ll take, and then I arrange those along a timeline. It’s tricky to do with Post-it notes, but easy to do with a web app.
The Idea

A screenshot of the live version of the Schedulr app.
Initially, I had massive goals for Schedulr: tying in weather, Google Maps, shared schedules, and allowing users to schedule any day they like. Because I only had a week and a half to work on this project, I ended up turning a lot of those into stretch goals and focusing on day planning, the primary focus of the app.
I knew from day one that I wanted drag and drop functionality, but didn’t know how to go about it, or what I really needed to be able to do. I looked at a variety of libraries and example apps and decided that React DnD would be the correct one for me. React DnD is an incredibly smart implementation of drag and drop and gives the developer a lot of tools that other options don’t. As it turns out, the flexibility and power of React DnD also came with a steep learning curve.
React DnD is built on Redux and may feel familiar to those who already use Redux. At this point, I had just finished learning React and trying to cram both Redux and React DnD into my brain while simultaneously working on my first React based project proved to be too much.
After a day and a half of getting nowhere with React DnD, I decided it was time to move on. I looked at my options, reassessed the situation and decided that React Draggable would be what I needed moving forward. As it turns out, Draggable was just right for my design.
I learned a lot of lessons about working with Draggable, dealing with scrolling elements and persisting data — enough that it’s going to be a story all its own.
As this was my first solo project and my first project with React, work started slowly. There was a bit of a learning curve relating both to the programming itself, and project planning for a single programmer. I found that if I used a Trello board and I branched and committed as much as I would on a group project, I was able to keep my train of thought organized. I also had a running document that explained the functionality of the app.
The Backend
I used a Rails backend with a pretty simple set of models. I needed databases for users and appointments, and a controller for each, as well as one to handle auth. To make things easier on the user, I also added some default values for each appointment.
The only thing that really tripped me up here is that I needed to hide my JWT secret somewhere in order to keep things secure. This was simple enough when hosted locally — simply use Figaro to create an environment variable in a Git ignored file and assign that variable to your secret.

My authorization show route, including the environment variable for secret
The problem came when I put the app up on Heroku. Every login was failing and I couldn’t figure out for the life of me why. And of course, since the file with the secret variable in it wasn’t getting uploaded, the deployed program didn’t know what the secret was.
The simple solution to this is that Heroku allows you to set config variables that don’t show up in your code. This can be done through Heroku’s web interface, but even more quickly and easily through the Heroku CLI using something akin to the below.
heroku config:set secret=itsmysecret
The Frontend
While the backend was surprisingly simple, the frontend presented me no end of problems. Draggable was a beast to tangle with on its own, but it wasn’t the only part of my program that fought me.
I had intended to do styling entirely with Semantic React, but as it turns out, the React implementation of Semantic is just a smidge incomplete. Because I was working on a very limited schedule (just a week and a half), I ended up with a hodgepodge of Semantic React and the traditional Semantic UI. The code isn’t always pretty or uniform, but in the end it all works.

Separate handleChange and handleSelect functions to deal with Semantic dropdown menus.
Dropdowns in Semantic really got me frustrated. I tried feeding them my usual handleChange function, but they would give me nothing back. As it turns out, the event.value of a dropdown came back as null, and the value I was looking for came through as the second argument.
The other thing that really gave me a kick in the hinder was passing state. I ended up with five containers and ten components for Schedulr, all of which needed different functions and bits of information.

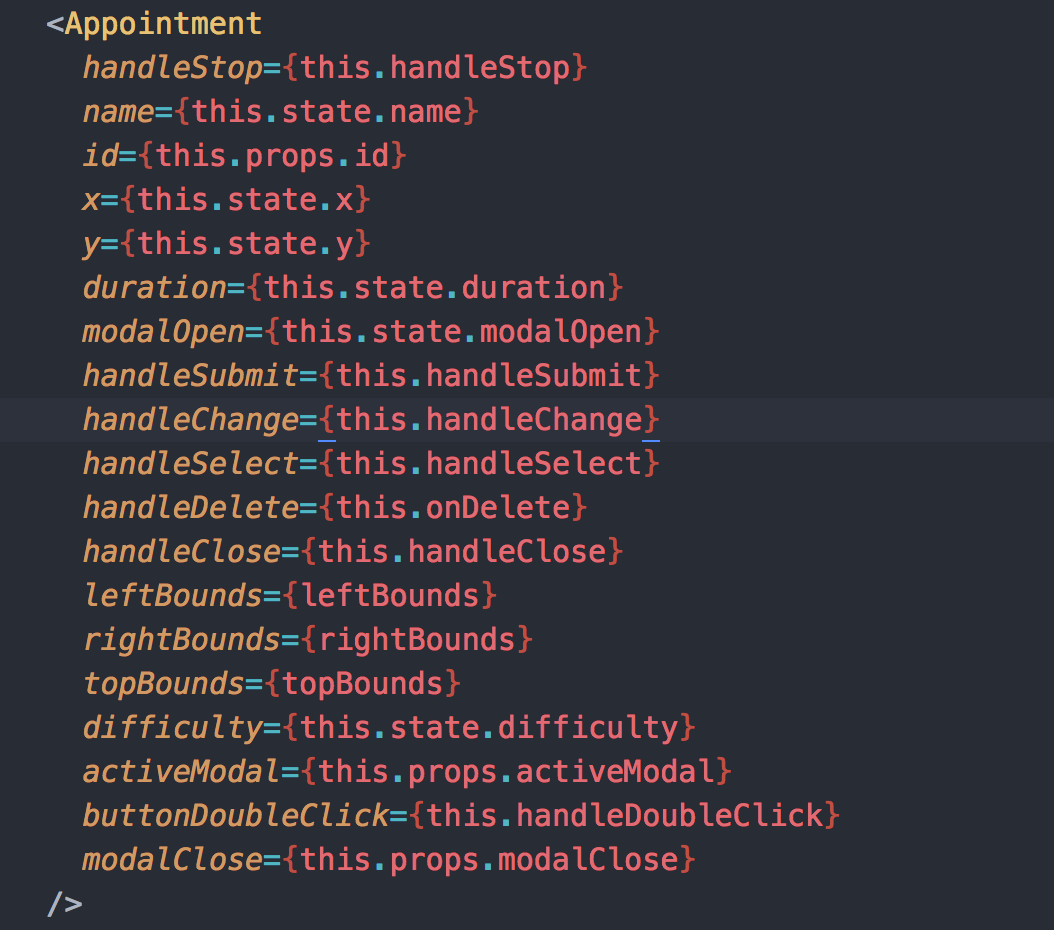
A total of 19 props being passed down from Appointment Container to Appointment
At its worst I was passing information from App to DayContainer to DayGrid to AppointmentList to AppointmentContainer to Appointment to EditModal. That’s six levels of frustration every time I needed to change, delete or add a function. I’m at the beginning stages of learning Redux now and I’m told that a lot of this will be solved. I’m looking forward to it.
The other frustration with props is the sheer number that I needed to pass down. At most I had 19 different props being passed from AppointmentContainer to Appointment. A big chunk of this is the coordinates for Draggable, as well as some formulas to make sure that the appointment would stay within its boundaries. I’m sure I could have done some refactoring if I had more time, but top priority was getting everything up and running.
Finished Product: The Good
In the end, I’m incredibly proud of what I was able to accomplish. In a week and a half I managed to put out what I consider to be my best work yet. It’s more polished than anything I’ve ever done, it works for its intended purpose, it’s up on Heroku for people to use and it even looks pretty.
I also managed to use Draggable, which is documented pretty well for what it is, but not for what I wanted to use it for. Searching online, I wasn’t able to find any direct sources for the things I was running into. I found plenty of things tangentially related to my problem that I could pull from, but no direct solutions. It’s the first time I’ve really ventured into uncharted territory like this.
The Bad and the Ugly

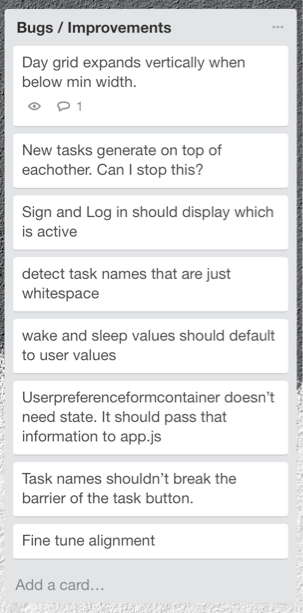
The remaining Bugs/Fixes section of my Trello board
I wouldn’t describe anything as particularly bad, but there’s definitely some ugly, particularly if the site is opened on mobile, or on a window that’s resized below 500px. I got much more excited about making each individual component than planning it out from the beginning, so finally putting everything together was a bit of chaos.
Draggable also presented a problem here, because the only way to set a grid for a dragged item to snap to is by specifying a pixel length. If the calendar changes sizes, the appointments don’t know how to follow suit.
The Takeaway
I learned a ton on this project, and went from feeling a little bit lost on day one to feeling like a seasoned React vet by the end of it. I wish I had tracked the time I put into each section, but I know that in total I put over 50 hours of my own work into the project. I’m also pretty confident that I used Draggable in a way that others haven’t done, or at least haven’t written about. I also learned, the hard way, about why people design before starting to write code. It’s a mistake I doubt I’ll make again.
I’ll have a post up soon all about React Draggable, how I implemented it, and the crazy things I had to do to get it working just the way I wanted.
Suggest:
☞ JavaScript Programming Tutorial Full Course for Beginners
☞ Learn JavaScript - Become a Zero to Hero
☞ Javascript Project Tutorial: Budget App
☞ JavaScript for React Developers | Mosh
☞ E-Commerce JavaScript Tutorial - Shopping Cart from Scratch