How to create a simple Medium with React & Node

TL;DR: In this article we are going to build a Medium.com clone using these technologies:
- Reactjs
- Redux
- Nodejs
- Cloudinary
- MongoDB
- Expressjs
Before we get started, I hope you have fundamental knowledge in the techs list above. OK, lets go through some core tech definitions.
before learn advance learn basic before

Source code
You can get the source code of the app we will build here and demo here.
What is Reactjs?
Reactjs is a Component-based JavaScript library built by Facebook.
Open-sourced by Facebook in 2013, it has been met with excitement from a wide community of developers. Corporate adopters have included the likes of Netflix, Yahoo!, Github, and Codecademy.
Devs have praised React for its:
- Performance
- Flexibility
- Declarative, component-based approach to UI
React was designed for the needs of Facebook’s development team, and is therefore suited particularly well to complex web applications that deal heavily with user interaction and changing data.
What is Node.js?
Nodejs is a server-side framework based on JavaScript built by Ryan Dahl in 2009. One of the great qualities of Node is its simplicity. Unlike PHP or ASP, there is no separation between the web server and code, nor do we have to customize large configuration files to get the behavior we want. With Node, we can create the web server, customize it, and deliver content. All this can be done at the code level.
Environment Setup
Before we begin, we are going to go thorugh this article in two stages:
- Server setup
- Client setup
The app consist of backend and frontend, the frontend will be built using React and Redux and the backend, Expressjs and Nodejs. So, we will build our backend in the Server setup section and frontend in the Client setup section.
Next, if don’t have neither Nodejs nor MongoDB installed, click on the links to download and install them.
Alright, let’s begin with our server.
We are going to use create-react-app to scaffold our project:
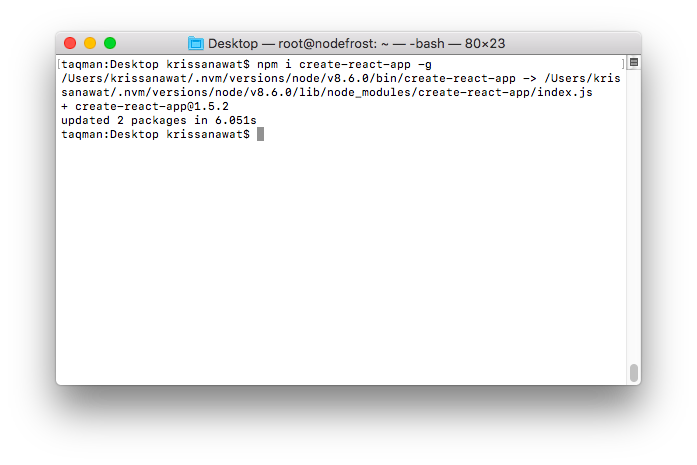
Then, run create-react-app medium-clone to generate pur project folder. create-react-app will install both react and react-dom libraries for us.
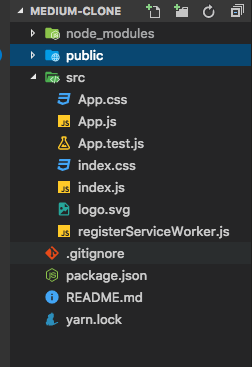
After this our folder would look this:
We are going to setup or server inside this folder. Go ahead and run the following commands to scaffold our server:
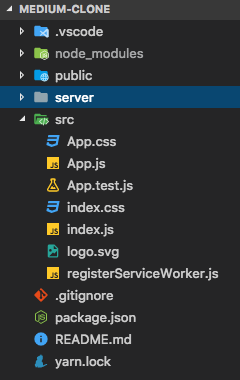
Here, we moved into our project folder, and created our server folder.
Server setup
We are going to install dependencies we need:
- mongoose
- cloudinary
- helmet
- express
- cors
- connect-multiparty
- body-parser
- compression
npm i mongoose cloudinary helmet express cors connect-multiparty body-parser compression -
open integrated terminal in VScode
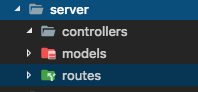
To begin coding our backend, we are going to use best practices, and they require we split our code into folders and files according to a general work.
- Controllers: This will be responsible for our server actions.
- Models: This will hold all our app’s database Schemas and Models.
- Routes: This will hold our routes.
Go ahead and scaffold the following folders and files:
Create Models
We will start by creating our database Schemas. Note, we are using mongoose, a MongoDB connection utility. Let’s touch some files:
- touch server/models/Article.js
- touch server/models/User.js
We will be using two Schemas Article and User.Article represents articles and User represents users.
// server/models/Article.js
const mongoose = require('mongoose')
let ArticleSchema = new mongoose.Schema(
    {
        text: String,
        title: String,
        description: String,
        feature_img: String,
        claps: Number,
        author: {
            type: mongoose.Schema.Types.ObjectId,
            ref: 'User'
        },
        comments: [
            {
                author: {
                    type: mongoose.Schema.Types.ObjectId,
                    ref: 'User'
                },
                text: String
            }
        ]
    }
);
ArticleSchema.methods.clap = function() {
    this.claps++
    return this.save()
}
ArticleSchema.methods.comment = function(c) {
    this.comments.push(c)
    return this.save()
}
ArticleSchema.methods.addAuthor = function (author_id) {
    this.author = author_id
    return this.save()
}
ArticleSchema.methods.getUserArticle = function (_id) {
    Article.find({'author': _id}).then((article) => {
        return article
    })
}
module.exports = mongoose.model('Article', ArticleSchema)
Now, make server/models/User.js to look like this:
// server/models/User.js
const mongoose = require('mongoose')
let UserSchema = new mongoose.Schema(
    {
        name: String,
        email: String,
        provider: String,
        provider_id: String,
        token: String,
        provider_pic: String,
        followers: [
            {
                type: mongoose.Schema.Types.ObjectId,
                ref: 'User'
            }
        ],
        following: [
            {
                type: mongoose.Schema.Types.ObjectId,
                ref: 'User'
            }
        ]
    }
)
UserSchema.methods.follow = function (user_id) {
    if (this.following.indexOf(user_id) === -1) {
        this.following.push(user_id)
    }
    return this.save()
}
UserSchema.methods.addFollower = function (fs) {
    this.followers.push(fs)
}
module.exports = mongoose.model('User', UserSchema)
Create Controllers
Here, we will create our controller files:

Open up controllers/article.ctrl.js, and paste the following code:
/** server/controllers/article.ctrl.js*/
const Article = require('./../models/Article')
const User = require('./../models/User')
const fs = require('fs')
const cloudinary = require('cloudinary')
module.exports = {
    addArticle: (req, res, next) => {
        let { text, title, claps, description } = req.body
        if (req.files.image) {
            cloudinary.uploader.upload(req.files.image.path, (result) => {
                let obj = { text, title, claps, description, feature_img: result.url != null ? result.url : '' }
                saveArticle(obj)
            },{
                resource_type: 'image',
                eager: [
                    {effect: 'sepia'}
                ]
            })
        }else {
            saveArticle({ text, title, claps, description, feature_img: '' })
        }
        function saveArticle(obj) {
            new Article(obj).save((err, article) => {
                if (err)
                    res.send(err)
                else if (!article)
                    res.send(400)
                else {
                    return article.addAuthor(req.body.author_id).then((_article) => {
                        return res.send(_article)
                    })
                }
                next()
            })
        }
    },
    getAll: (req, res, next) => {
        Article.find(req.params.id)
        .populate('author')
        .populate('comments.author').exec((err, article)=> {
            if (err)
                res.send(err)
            else if (!article)
                res.send(404)
            else
                res.send(article)
            next()
        })
    },
    /**
     * article_id
     */
    clapArticle: (req, res, next) => {
        Article.findById(req.body.article_id).then((article)=> {
            return article.clap().then(()=>{
                return res.json({msg: "Done"})
            })
        }).catch(next)
    },
    /**
     * comment, author_id, article_id
     */
    commentArticle: (req, res, next) => {
        Article.findById(req.body.article_id).then((article)=> {
            return article.comment({
                author: req.body.author_id,
                text: req.body.comment
            }).then(() => {
                return res.json({msg: "Done"})
            })
        }).catch(next)
    },
    /**
     * article_id
     */
    getArticle: (req, res, next) => {
        Article.findById(req.params.id)
        .populate('author')
        .populate('comments.author').exec((err, article)=> {
            if (err)
                res.send(err)
            else if (!article)
                res.send(404)
            else
                res.send(article)
            next()
        })
    }
}
Looking at tthe above code, you can see we have CRUDy functions and helper functions: getArticle, addArticle, getAll, clapArticle, commentArticle.
We first imported our Article model, we defined earlier, then, we proceeded to import cloudinary.
Note Cloudinary is an Image/Video service which handles media (Images, Videos) sharing seamlessly. We will use it to upload our article feature image. They will host the images for us and use their image url to display our images on our frontend.
Let’s go through the functions to explain better what they do:
- getArticle
- addArticle
- getAll
- clapArticle
- commentArticle
Create Routes
We are going to create our routes. Run the following commands:
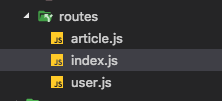
article.js will hold routes for our articles endpoint and user.js will hold routes for our users.
We will create an index route function that will export all routes(routes/article.jsand routes/user.js) in our app.
- touch server/routes/index.js
We now open up routes/article.js, and paste the following code:
// server/routes/article.js
const articlecontroller = require('./../controllers/article.ctrl')
const multipart = require('connect-multiparty')
const multipartWare = multipart()
module.exports = (router) => {
    /**
     * get all articles
     */
    router
        .route('/articles')
        .get(articlecontroller.getAll)
    /**
     * add an article
     */
    router
        .route('/article')
        .post(multipartWare, articlecontroller.addArticle)
    /**
     * comment on an article
     */
    router
        .route('/article/comment')
        .post(articlecontroller.commentArticle)
    /**
     * get a particlular article to view
     */
    router
        .route('/article/:id')
        .get(articlecontroller.getArticle)
}
We now have our routes all defined, We are now going to create a function in routes/index.js that takes the Express.Router instance
and paste code below to
// server/routes/index.js
const user = require('./user')
const article = require('./article')
module.exports = (router) => {
    user(router)
    article(router)
}
Creating server entry-point
Now, we are done setting up our routes, controllers, and models. It’s time to add entry-point to our backend.
run the following command:
touch server/app.js
and paste code below to
// server/app.js

/** require dependencies */
const express = require("express")
const routes = require('./routes/')
const mongoose = require('mongoose')
const cors = require('cors')
const bodyParser = require('body-parser')
const helmet = require('helmet')
const cloudinary = require('cloudinary')

const app = express()
const router = express.Router()
const url = process.env.MONGODB_URI || "mongodb://localhost:27017/medium"

/** configure cloudinary */
cloudinary.config({
    cloud_name: 'YOUR_CLOUDINARY_NAME_HERE',
    api_key: 'YOUR_CLOUDINARY_API_KEY_HERE',
    api_secret: 'YOUR_CLOUDINARY_API_SECRET_HERE'
})

/** connect to MongoDB datastore */
try {
    mongoose.connect(url, {
        //useMongoClient: true
    })
} catch (error) {

}

let port = 5000 || process.env.PORT

/** set up routes {API Endpoints} */
routes(router)

/** set up middlewares */
app.use(cors())
app.use(bodyParser.json())
app.use(helmet())
//app.use('/static',express.static(path.join(__dirname,'static')))

app.use('/api', router)

/** start server */
app.listen(port, () => {
    console.log(`Server started at port: ${port}`);
});
We used several useful middlewares here.
- cors: It prevents cross-origin request errors.
- helmet: Like a real helmet, armours our API to prevent attacks.
- bodyparse.json: It is used to parse formdata in POST requests into
req.bodyobject.
To run our server, type the following command:
node server/app.js
You will see this on your terminal:
node server/app.jsServer started at port: 5000
Test app API endpoints using cURL
We are done building our backend, we will test the API endpoints using cURL.
NB: MongoDB instance must be running, before you begin the cURL test. To start a MongoDB server, run the command: mongod.
TEST: GET A USER
curl --request GET \ --url http://localhost:5000/api/user/5a92cf3f2dec79115c8fc78a
TEST: GET ALL ARTICLES
curl --request GET \ --url http://localhost:5000/api/articles
TEST: GET AN ARTICLE
curl --request GET \ --url http://localhost:5000/api/article/5a92e41abb04440888395e44
TEST: COMMENT ON AN ARTICLE
curl --request POST \
  --url http://localhost:5000/api/article/comment \
  --header 'content-type: application/json' \
  --data '{"comment": "dfdggd", "author_id": "5a92cf3f2dec79115c8fc78a", "article_id": "5a92e41abb04440888395e44"}'
TEST: CLAP AN ARTICLE
curl --request POST \ --url http://localhost:5000/api/article/clap \ --header 'content-type: application/json' \ --data '{"article_id": "5a92e41abb04440888395e44"}'
Client setup
We are done with our backend, its time to focus to on our frontend. To recap on th purpose of this article. React apps are made of components (Stateful and Stateless). To make our app easier and readable we are going to break it down to components.
We are building a Medium.com clone. Medium.com is a story-telling service that allows uesrs write stories, articles and tutorials. It has many features that we cannot duplicate here, we will clone only the core features.
Here are some features we are going to implement:
- View articles
- Write article
- View article
- Social sign in
- Clap article
- Follow user
- View user
Also, our app will be broken into components. Following the above features we can map out components from them:
- Feed component
- Editor component
- ArticleView component
- SignInWith component
- FollowButton component
- Profile component
Asides these components, we will add helper components that will come in handy to avoid long and complex code:
- AsideFeed component
- Header component
- EditorHeader component
Note: The seemingly simple Medium.com features implemented here, are quite a little bit complex and not to make this article a long boring read, we will summarize the actions taken here. It is left for readers to test it out and find how it works, while this article serving as reference.
Install project (React, Redux) dependencies
We are now going to install NPM module dependencies we will need. Here are them:
- axios
- history
- prop-types
- react-google-login
- react-redux
- react-router
- react-router-dom
- react-router-redux
- react-scripts
- redux
- redux-devtools-extension
- redux-logger
- redux-thunk
- medium-editor
- marked
NB: react and react-dom have been already been installed by create-react-app when we scaffolded our project folder.
npm i axios history prop-types react-google-login react-redux react-router react-router-dom react-router-redux react-scripts redux redux-devtools-extension redux-logger redux-thunk -S
Add State Management (Redux)
Before anything, it’s a good programmer’s first move to define his app data structure.
Bad programmers think about their code, good programmers think about their data structure → > Linus Torvalds
We will setup our reducers and state. We have an articles reducer and state which will hold current article being viewed and array of articles loaded from our database:
const initialState = { articles: [], article: {}}
Also, we will have authUser reducer and state:
const initialState = { user: {}, isAuth: false, profile: {}}
OK, let’s create our reducers folder.
mkdir src/redux
The command above cretea redux folder in src directory. redux will house our redux and state management files. Let’s create a folder for our reducer files:
- mkdir src/redux/reducers
- touch src/redux/reducers/articles.js
- touch src/redux/reducers/authUser.js
- touch src/redux/reducers/common.js
Open up src/redux/reducers/articles.js and paste the following code:
// src/redux/reducers/articles.js
const initialState = {
    articles: [],
    article: {}
}
export default (state=initialState, action) => {
    switch (action.type) {
        case 'LOAD_ARTICLES' :
        return {
            ...state,
            articles: action.articles
        }
        case 'VIEW_ARTICLE':
        return {
            ...state,
            article: action.article
        }
        case 'CLAP_ARTICLE':
        let article = Object.assign({}, state.article)
        article.claps++
        console.log(article)
        return {
            ...state,
            article: article
        }
        default:
            return state
    }
}
Next, let’s fill in src/redux/reducers/authUser.js file:
//src/redux/reducers/authUser.js
const initialState = {
    user: {},
    isAuth: false,
    profile: {}
}
export default (state = initialState, action) => {
  switch (action.type) {
    case 'SET_USER':
        return {
            ...state,
            isAuth: Object.keys(action.user).length > 0 ? true : false,
            user: action.user
        }
    case 'FOLLOW_USER':
    let user = Object.assign({}, state.user)
    user.following.push(action.user_id)
    return {
        ...state,
        user: user
    }
    case 'SET_PROFILE':
    return {
        ...state,
        profile: action.profile
    }
    default:
      return state;
  }
}
Open up src/redux/reducers/common.js file and paste the following code:
// src/redux/reducers/common.js
const defaultState = {
appName: '',
modalMode: false
};
export default (state = defaultState, action) => {
switch (action.type) {
case 'TOGGLE_MODAL':
return {
...defaultState,
modalMode: action.modalMode
}
default:
return state;
}
};
Here, this reducer function will be responsible for holding our app name and the sign-in SignInWith modal. We defined a TOGGLE_MODAL action that will set the modalMode to either true or false. All the sign-in SignInWith component have to do is to connect to the state modalMode and respond according to the state’s mode.
Next, we will define actions that will dispatch actions to our redux store:
- mkdir src/redux/actions
- touch src/redux/actions/actions.js
Open up src/redux/actions/actions.js and paste the following code:
// src/redux/actions/actions.js
/** */
import axios from 'axios'
//const url = "http://localhost:5000/api/"
const url = process.env.NODE_ENV === 'production' ? "/api/" : "http://localhost:5000/api/"
export function loadArticles () {
    return (dispatch) => {
        axios.get(`${url}articles`)
        .then((res) => {
            let articles = res.data
            dispatch({type:'LOAD_ARTICLES', articles})
        }).catch((err) => {
            console.log(err)
        })
    }
}
export function getUser (_id) {
    return axios.get(`${url}user/${_id}`).then((res)=>{
        return res.data
    }).catch(err=>console.log(err))
}
export function getUserProfile (_id) {
    return (dispatch) => {
        axios.get(`${url}user/profile/${_id}`).then((res)=>{
            let profile = res.data
            dispatch({type: 'SET_PROFILE', profile})
        }).catch(err=>console.log(err))
    }
}
export function getArticle (article_id) {
    return (dispatch) => {
        axios.get(`${url}article/${article_id}`)
        .then((res) => {
            let article = res.data
            dispatch({type: 'VIEW_ARTICLE', article})
        }).catch((err) => console.log(err))
    }
}
// article_id, author_id, comment
export function comment () {
    return (dispatch) => {
    }
}
//req.body.article_id
export function clap (article_id) {
    return (dispatch) => {
        axios.post(`${url}article/clap`,{ article_id }).then((res) => {
            dispatch({type:'CLAP_ARTICLE'})
        }).catch((err)=>console.log(err))
    }
}
//id, user_id
export function follow (id, user_id) {
    return (dispatch) => {
        axios.post(`${url}user/follow`,{ id, user_id }).then((res) => {
            dispatch({type:'FOLLOW_USER', user_id})
        }).catch((err)=>console.log(err))
    }
}
export function SignInUser (user_data) {
    return (dispatch) => {
        axios.post(`${url}user`,user_data).then((res)=>{
            let user = res.data
            localStorage.setItem('Auth', JSON.stringify(user))
            dispatch({type: 'SET_USER', user})
        }).catch((err)=>console.log(err))
    }
}
export function toggleClose() {
    return (dispatch) => {
        dispatch({type: 'TOGGLE_MODAL', modalMode: false})
    }
}
export function toggleOpen() {
    return (dispatch) => {
        dispatch({type: 'TOGGLE_MODAL', modalMode: true})
    }
}
We have to create a function that will combine our reducers into a single reducer. Let’s create a reducer file:
- touch src/redux/reducer.js
Paste the following code in it:
import { combineReducers } from 'redux';
import articles from './reducers/articles';
import authUser from './reducers/authUser';
import common from './reducers/common';
import { routerReducer } from 'react-router-redux';
export default combineReducers({
  articles,
  authUser,
  common,
  router: routerReducer
});
Here, it uses combineReducers function from redux to combine our reducers into a single reducer function.
With this combination of reducers into one reducer function, it will be used as an argument to create our store using redux’s createStore function. Let’s create another file:
touch src/redux/store.js
Open it up and paste the folowing code:
// src/redux/store.js
import { applyMiddleware, createStore } from 'redux';
//import { createLogger } from 'redux-logger'
import { composeWithDevTools } from 'redux-devtools-extension/developmentOnly';
import reducer from './reducer';
import thunk from 'redux-thunk'
import createHistory from 'history/createBrowserHistory';
export const history = createHistory();
// Build the middleware for intercepting and dispatching navigation actions
//const myRouterMiddleware = routerMiddleware(history);
export const store = createStore(
  reducer, composeWithDevTools(applyMiddleware(thunk)));
We imported our reducer, and created our store using createStore and the reducer as an argument. We are done setting up our redux store. To make it accessible across our React components we are going to encapsulate our entire app into the Providercomponent provided by react-redux.
Now, we open up our src/index.js file and modify it to this:
// src/index.js
import React from 'react';
import ReactDOM from 'react-dom';
import { Provider } from 'react-redux';

import App from './App.js';
import registerServiceWorker from './registerServiceWorker';
import { store, history } from './redux/store';
ReactDOM.render((
    <Provider store={store}>
        <App />
    </Provider>
), document.getElementById('root'));
registerServiceWorker();
You see here, we imported our store from ./redux/store file and passed it as prop to the Provider componnent. Note, our App component which contains our entire components is a child of the Provider component. The Provider component passes the store down to its children through their contexts.
Add routes
We have successfully wrapped our app in our redux store. Now, we will define routes. Following our list of features, we acn easily deduce posiible routes our app will have:
- “/”- This is the index route that will display articles feed sorting from latest to the last article published. This route will be handled by the
Feedcomponent. - “/profile/:id”- This route activates the Profile component. It also requires a user id so as to generate the user’s profile.
- “/articleview/:id”- This is used to view an article using its id.
- “/editor”- his enables users to write articles and submit. It will be authenticated so that only registered users will be able to access it.
- __”**”-__This routes is responsible for managing any unmatched URL request.
Let’s scaffold all our components we’ll be using. Run the following commands:
touch src/components/Profile
touch src/components/SignInWith
touch src/components/Feed
touch src/components/ArticleView
touch src/components/AsideFeed
touch src/components/Editor
touch src/components/EditorHeader
touch src/components/Header
touch src/components/FollowButton
We will add a base route in src/index.js, then add all our routes in src/App.js:
// src/index.js
import React from 'react';
import ReactDOM from 'react-dom';
import './assets/medium.css';
import { Provider } from 'react-redux';
import { Switch, Route } from 'react-router-dom';
import { ConnectedRouter } from 'react-router-redux';
import App from './App.js';
import registerServiceWorker from './registerServiceWorker';
import { store, history } from './redux/store';

ReactDOM.render((
    <Provider store={store}>
        <ConnectedRouter history={history}>
            <Switch>
                <Route path="/" component={App} />
            </Switch>
        </ConnectedRouter>
    </Provider>
), document.getElementById('root'));
registerServiceWorker();
Let’s open src/App.js and add our routes defined earlier:
import React, { Component } from 'react';
import { Switch, Route } from 'react-router-dom'
import Header from './components/Header';
import Feed from './components/Feed'
import Profile from './components/Profile'
import ArticleView from './components/ArticleView'
import Editor from './components/Editor'
import SignInWith from './components/SignInWith'
class App extends Component {
    render() {
        const pathname = window.location.pathname
        return (
            <div>
            { !pathname.includes('editor') ? <Header /> : '' }
            <SignInWith />
                <Switch>
                    <Route exact path="/" component={Feed} />
                    <Route path="/profile/:id" component={Profile} />
                    <Route path="/articleview/:id" component={ArticleView} />
                    <Route path="/editor" component={Editor} />
                    <Route path="**" component={Feed} />
                </Switch>
            </div>
        );
    }
}
export default App;
Our app routes are all defined here, remember our base route ‘/’ in src/index.js, routes all URL requests starting with ‘/’ to App.js, then the Route component will activate the component that matches its path prop. If none matches the path with the prop ****** is activated.
Authenticate routes
Here, we are going to secure our app, this prevents users from accessing pages without being registered.
In this app, we are only going to secure the /editor route. That is, you have to be registered and logged in inorder to write an article.
To auth our /editor route, we are going to create a component Authenticate, this component will be able to get the isAuth state from our app store to deduce whether to render the Editor compnent sent to it.
Run the following commands:
- mkdir src/utils
- touch src/utils/requireAuth.js
Open the src/utils/requireAuth.js and paste the following code:
import React, {Component} from 'react'
import PropTypes from 'prop-types'
import { connect } from 'react-redux'
export default function (Conmponent) {
    class Authenticate extends Component {

        componentWillMount() {
            if (!this.props.isAuth) {
                this.context.router.history.push('/')
            }
        }
        render () {
            return(
            <Conmponent {...this.props} />
            )
        }
    }
    Authenticate.contextTypes = {
        router: PropTypes.object.isRequired
    }
    const mapStateToProps = state => {
        return {
            isAuth: state.authUser.isAuth
        }
    }
    return connect(mapStateToProps)(Authenticate)
}
You see here, we tap into our app redux store using the connect function react-redux, we get the state slice isAuth. This isAuth will be set to true if the user is logged. componentDidMount checks for truthy isAuth and pushes / to the navigation history to redirect the user if he/she is not logged in, therefore the render method will not be called.
We will now import this function in src/App.js and pass the Editor component as param to this function. Modify your src/App.js to look like this:
// src/App.js
import React, { Component } from 'react';
import { Switch, Route } from 'react-router-dom'
import Header from './components/Header';
import Feed from './components/Feed'
import Profile from './components/Profile'
import ArticleView from './components/ArticleView'
import Editor from './components/Editor'
import requireAuthentication from './utils/requireAuth'
import SignInWith from './components/SignInWith'
class App extends Component {
    render() {
        const pathname = window.location.pathname
        return (
            <div>
            { !pathname.includes('editor') ? <Header /> : '' }
            <SignInWith />
                <Switch>

                    <Route exact path="/" component={Feed} />
                    <Route path="/profile/:id" component={Profile} />
                    <Route path="/articleview/:id" component={ArticleView} />
                    <Route path="/editor" component={requireAuthentication(Editor)} />
                    <Route path="**" component={Feed} />
                </Switch>
            </div>
        );
    }
}
export default App;
Looking at what we have done so far, we authenticated the /editor route. We will now have to auth users from the src/index.js, update the isAuth state before activating the router.
Modify the src/index.js to look like this:
import React from 'react';
import ReactDOM from 'react-dom';
import './assets/medium.css';
import { Provider } from 'react-redux';
import { Switch, Route } from 'react-router-dom';
import { ConnectedRouter } from 'react-router-redux';
import App from './App.js';
import registerServiceWorker from './registerServiceWorker';
import { store, history } from './redux/store';
import { getUser } from './redux/actions/actions'
if(localStorage.Auth) {
    // update localstorage
    store.dispatch({type: 'SET_USER', user: JSON.parse(localStorage.Auth)})
    var _id = JSON.parse(localStorage.Auth)._id
    getUser(_id).then((res) => {
        store.dispatch({type: 'SET_USER', user: res})
    })
}
ReactDOM.render((
    <Provider store={store}>
        <ConnectedRouter history={history}>
            <Switch>
                <Route path="/" component={App} />
            </Switch>
        </ConnectedRouter>
    </Provider>
), document.getElementById('root'));
registerServiceWorker();
Here, we checked to if our localStorage key Auth is already defined, if so we first update our isAuth state. We go to fetch the user credentials from our datastore and update our state to be up to-date. If we hadn’t added this:
// update localstorage
store.dispatch({type: 'SET_USER', user: JSON.parse(localStorage.Auth)})
and the user is navigating to the Editor component. The action getUser which fetches user’s data from datastore is an async method so our Authentication will be executed before its execution finishes and updates the isAuth state.
Implementing the Feed component
Here, we are going to add functionality to our Feed component, remember we scaffoled all the components we’ll need earlier.
This Feed component will handle the display of all articles posted. It will pull all the articles from our datastore and display them, sorting them acoording to the most recent posted.
Let’s open up our src/components/Feed.js file and paste the following code:
// src/components/Feed.js
import React, { Component } from 'react';
import { connect } from 'react-redux';
import {
    loadArticles
} from './../redux/actions/actions'
import AsideFeed from './AsideFeed'
const mapStateToProps = state => {
    return {
        articles: state.articles.articles
    }
}
class Feed extends Component {
    componentWillReceiveProps(nextProps) {

    }

    componentWillMount() {
        this.props.loadArticles()
    }

    render() {
    const articles = this.props.articles.reverse().map((article)=>
                <div className="post-panel">
                    <div className="post-metadata">
                        <img alt="" className="avatar-image" src={article.author.provider_pic} height="40" width="40"/>
                        <div className="post-info">
                            <div data-react-className="PopoverLink">
                            <span className="popover-link" data-reactroot=""><a href={`/profile/${article.author._id}`}>{article.author.name}</a></span></div>
                            <small>Posted • A must read</small>
                        </div>
                    </div>
                    {article.feature_img.length > 0 ? <div class="post-picture-wrapper">
                        <img src={article.feature_img} alt="Thumb" />
                    </div>:''}
                    <div className="main-body">
                        <h3 className="post-title"><a href={`/articleview/${article._id}`} >{article.title}</a></h3>
                        <div className="post-body">
                            <p className="" dangerouslySetInnerHTML={{__html: article.description}}></p>
                        </div>
                        <a className="read-more" href={`/articleview/${article._id}`}>Read more</a>
                    </div>
                    <div className="post-stats clearfix">
                        <div className="pull-left">
                            <div className="like-button-wrapper">
                                <form className="button_to" method="get" action="">
                                    <button className="like-button" data-behavior="trigger-overlay" type="submit"><i className="fa fa-heart-o"></i><span className="hide-text">Like</span></button></form>
                                <span className="like-count">{article.claps}</span>
                            </div>
                        </div>
                        <div className="pull-right">
                            <div className="bookmark-button-wrapper">
                                <form className="button_to" method="get" action=""><button className="bookmark-button" data-behavior="trigger-overlay" type="submit">      <span className="icon-bookmark-o"></span><span className="hide-text">Bookmark</span></button></form>
                            </div>
                        </div>
                        <div className="response-count pull-right">
                        </div>
                    </div>
                </div>
            )
        return (
            <div>
                <div className="container-fluid main-container">
                    <div className="col-md-6 col-md-offset-1 dashboard-main-content">
                        <div className="posts-wrapper animated fadeInUp" data-behavior="endless-scroll" data-animation="fadeInUp-fadeOutDown">
                            {articles}
                        </div>
                    </div>
                    {this.props.articles ? <AsideFeed _articles={this.props.articles} /> : ''}
                </div>
            </div>
        );
    }
}
export default connect(mapStateToProps, { loadArticles })(Feed);
Looking at the code, we used react-redux's connect function to map the state articles and the the action loadArticles to the component.
We loaded articles stored in our database in the componentDidMount method. This was inherited from React.Component class.
The result of the operation was the sorted and mapped into the render method then finally displayed inside the return statement.
Create ArticleView page
We will implement the ArticleView component, it handles the operation of displaying a particular article based on the id of the article.
Open up src/components/ArticleView.js, and make it look like this:
import React, { Component } from 'react';
import { connect } from 'react-redux'
import {
    getArticle,
    clap,
    follow
} from './../redux/actions/actions'
import PropTypes from 'prop-types'
import FollowButton from './FollowButton'
const mapStateToProps = state => {
    return {
        _article: state.articles.article,
        user: state.authUser.user
    }
}
class ArticleView extends Component {
    componentDidMount() {
        document.body.className = 'posts show'
    }
    componentWillMount() {
        this.props.getArticle(this.props.match.params.id)
    }
    componentWillUnmount() {
        document.body.className = ''
    }
    render() {
        const { text, claps, title, feature_img, author } = this.props._article
        let author_name, author_img, author_id
        if (author) {
            const { name, provider_pic, _id } = author
            author_name = name
            author_id = _id
            author_img = provider_pic
        }
        return (
                <div>
                <div className="container-fluid main-container">
                <div className="row animated fadeInUp" data-animation="fadeInUp-fadeOutDown">
                    <div id="main-post" className="col-xs-10 col-md-8 col-md-offset-2 col-xs-offset-1 main-content">
                        <div className="pull-right">
                            {this.props.user ? <FollowButton user={`${this.props.user.following}`} to_follow={`${author_id}`} /> : ''}
                        </div>
                        <div className="post-metadata">
                            <img alt={author_name} className="avatar-image" src={author_img} height="40" width="40" />
                            <div className="post-info">
                                <div data-react-className="PopoverLink" data-react-props=""><span className="popover-link" data-reactroot=""><a href={`/profile/${author_id}`}>{author_name}</a></span></div>
                                <small>Published • nice story</small>
                            </div>
                        </div>

                        {!feature_img || !feature_img.length > 0 ? '' : <div className="post-picture-wrapper">
                            <img src={feature_img} alt="feature img 540" />
                        </div> }
                        <h3 className="title">{title}</h3>
                        <div className="body">
                            <p></p>
                            <p className=""dangerouslySetInnerHTML={{__html: text}}>
                            </p>
                            <p></p>
                        </div>
                        <div className="post-tags">
                            <a className="tag" href="">Story</a>
                            <a className="tag" href="">Community</a>
                        </div>
                        <div className="post-stats clearfix">
                            <div className="pull-left">
                                <div className="like-button-wrapper">
                                    <button onClick={() => this.props.clap(this.props._article._id)} className="like-button" data-behavior="trigger-overlay" type="submit">
                                    <i className="fa fa-heart-o"></i><span className="hide-text">Like</span>
                                    </button>
                                     <span className="like-count">{claps}</span>
                                </div>
                            </div>
                            <div className="pull-left">
                                <a className="response-icon-wrapper" href="#">
                                    <i className="fa fa-comment-o"></i>
                                    <span className="response-count" data-behavior="response-count">0</span>
                                </a>
                            </div>
                            <div className="pull-right">
                                <div className="bookmark-button-wrapper">
                                    <form className="button_to" method="get" action=""><button className="bookmark-button" data-behavior="trigger-overlay" type="submit">      <span className="icon-bookmark-o"></span><span className="hide-text">Bookmark</span></button>
                                    </form>
                                </div>
                            </div>
                        </div>
                        <div className="author-info">
                            <div clas="author-metadata">
                                <img alt={author_name} className="avatar-image" src={author_img} height="50" width="50" />
                                <div className="username-description">
                                    <h4>{author_name}</h4>
                                    <p></p>
                                </div>
                            </div>
                            {this.props.user ? <FollowButton user={`${this.props.user.following}`} to_follow={`${author_id}`} /> : ''}
                        </div>
                    </div>
                </div>
                <div className="post-show-footer row animated fadeInUp" data-animation="fadeInUp-fadeOutDown">
                    <div className="col-xs-10 col-md-6 col-xs-offset-1 col-md-offset-3 main-content related-stories">
                        <h4 className="small-heading">Related stories</h4>
                        <div className="post-list-item">
                            <div className="flex-container">
                                <div className="avatar-wrapper">
                                    <img alt="" className="avatar-image" src="" height="40" width="40" />
                                </div>
                                <div className="post-info">
                                    <strong className="pli-title"><a href="#"></a></strong><br/>
                                    <small className="pli-username"><a href="#"></a></small>
                                </div>
                            </div>
                        </div>
                    </div>
                    <div id="responses" className="col-xs-10 col-md-6 col-xs-offset-1 col-md-offset-3 main-content">
                        <h4 className="small-heading">Responses</h4>
                        <div data-behavior="responses-list">
                        </div>
                    </div>
                </div>
                <div className="post-metadata-bar" data-page="post-metadata-bar">
                    <div className="flex-container is-inView" data-behavior="animated-metadata">
                        <div className="post-stats flex-container">
                            <div className="like-button-wrapper">
                                <form className="button_to" method="get" action=""><button className="like-button" data-behavior="trigger-overlay" type="submit">      <i className="fa fa-heart-o"></i><span className="hide-text">Like</span></button>
                                </form> <span className="like-count">0</span>
                            </div>

                            <div>
                                <a className="response-icon-wrapper" href="https://my-medium-clone.herokuapp.com/posts/it-s-looking-good#responses">
                                    <i className="fa fa-comment-o"></i>
                                    <span className="response-count" data-behavior="response-count">0</span>
                                </a>
                            </div>
                            <div className="bookmark-button">
                                <div className="bookmark-button-wrapper">
                                    <form className="button_to" method="get" action=""><button className="bookmark-button" data-behavior="trigger-overlay" type="submit">      <span className="icon-bookmark-o"></span><span className="hide-text">Bookmark</span></button>
                                    </form>
                                </div>
                            </div>
                        </div>
                        <div className="metabar-author-info flex-container flex-space-btw">
                            <div>
                                <img alt={author_name} className="avatar-image" src={author_img} height="35" width="35" />
                                <div data-react-className="PopoverLink" ><span className="popover-link" data-reactroot=""><a href={`/profile/${author_img}`}>{author_name}</a></span></div>
                            </div>
                            <div data-react-className="UserFollowButton" >
                                {this.props.user ? <FollowButton user={`${this.props.user.following}`} to_follow={`${author_id}`} /> : ''}
                            </div>
                        </div>
                    </div>
                </div>
                </div>
                </div>
        );
    }
}
ArticleView.propTypes = {
    params: PropTypes.object.isRequired
}
export default connect(mapStateToProps, {
    getArticle,
    clap,
    follow
})(ArticleView);
We did a lot of work here. Like before, we connected the states will be using to this component.Then, we fetched the article from our datastore using the id param passed along with the URL request. We used the getArticle to load the article.
Moving onto the render method. We did a lot of object destructing. ALl that was done inorder to extract the properties we want to display from the datastore. Remember our Article models, we defined in the server setup section? These are its properties we are retreiving now.
Create Profile page
OK, so far so good. Here, we will add functionality to our src/components/Profile.jscomponent. Open up the file and paste the following code:
// src/components/Profile.js
import React, { Component } from 'react';
import { connect } from 'react-redux'
import PropTypes from 'prop-types'
import FollowButton from './FollowButton'
import {
getUserProfile,
follow
} from './../redux/actions/actions'
class Profile extends Component {
componentDidMount() {
document.body.className = 'users show'
}
componentWillUnmount() {
document.body.className = ''
}
componentWillMount() {
this.props.getUserProfile(this.props.match.params.id)
}
render() {
return (
<div>
{Object.keys(this.props.profile).length > 0 ? <ItemList items ={this.props} /> : ''}
</div>
);
}
}
function ItemList ({items}) {
return (
<div className="users show">
<div className="container-fluid main-container">
<div className="banner-container animated fadeInUp-small" data-animation="fadeInUp-fadeOutDown-slow">
<div className="hero-wrapper">
<header className="hero">
<div className="profile-info">
<h1 className="hero-title">{items.profile.user.name}</h1>
<p className="hero-description">{items.profile.user.email}</p>
<div className="hero-location">
<i className="fa fa-map-marker"></i>{items.profile.user.provider}
</div>
</div>
<div className="hero-avatar">
<img alt={items.profile.user.name} className="avatar-image" src={items.profile.user.provider_pic} height="100" width="100"/>
</div>
</header>
<div>
<div data-react-className="UserFollowContainer" data-react-props="{"followerCount":6,"followingCount":2,"following":false,"followed_id":396,"hideButton":false,"username":"mark","overlayTrigger":true}">
<div data-reactroot="">
<div className="following-metadata"><span className="following-count"><span><span><b>{items.profile.user.following.length}</b> Following</span></span>
</span><span className="follower-count"><span><span><b>{items.profile.user.followers.length}</b> Followers</span></span>
</span>
</div>
<div>{items.user.name ? <FollowButton user={`${items.user.following}`} to_follow={`${items.profile.user._id}`} /> : ''}</div>
</div>
</div>
</div>
</div>
</div>
<div className="posts-wrapper animated fadeInUp" data-animation="fadeInUp-fadeOutDown">
<h4 className="small-heading border-top">latest</h4>
{ items.profile.articles.map((article)=>
<div className="post-panel">
<div className="post-metadata">
<img alt="mark" className="avatar-image" src={items.profile.user.provider_pic} height="40" width="40"/>
<div className="post-info">
<div data-react-className="PopoverLink"><span className="popover-link" data-reactroot=""><a href="javascript:void(0);">{items.profile.user.name}</a></span></div>
<small>Published • a must read</small>
</div>
</div>
{article.feature_img.length > 0 ? <div className="post-picture-wrapper">
<img src={article.feature_img} alt="alt"/>
</div> : ''}
<div className="main-body">
<h3 className="post-title"><a href={`/articleview/${article._id}`}>{article.title}</a></h3>
<div className="post-body">
<p className="" dangerouslySetInnerHTML={{__html: article.description}}></p>
</div>
<a className="read-more" href={`/articleview/${article._id}`}>Read more</a>
</div>
<div className="post-stats clearfix">
<div className="pull-left">
<div className="like-button-wrapper">
<form className="button_to" method="get" action="">
<button className="like-button" data-behavior="trigger-overlay" type="submit"><i className="fa fa-heart-o"></i><span className="hide-text">Like</span></button>
</form>
<span className="like-count">{article.claps}</span>
</div>
</div>
<div className="pull-right">
<div className="bookmark-button-wrapper">
<form className="button_to" method="get" action=""><button className="bookmark-button" data-behavior="trigger-overlay" type="submit"><span className="icon-bookmark-o"></span><span className="hide-text">Bookmark</span></button>
</form>
</div>
</div>
<div className="response-count pull-right">
<a className="response-count" href="javascript:void(0);">0 responses</a>
</div>
</div>
</div>
)}
</div>
</div>
</div>
)
}
Profile.propTypes = {
params: PropTypes.object.isRequired
}
const mapStateToProps = state => {
return {
_article: state.articles.article,
user: state.authUser.user,
profile: state.authUser.profile
}
}
export default connect(mapStateToProps, {
getUserProfile,
follow
})(Profile);
Like before, we connected our app state and actions to the Profile component props. We loade the user profile using the getUserProfile action. Looking at the render method, you will notice the use of stateless component ItemList. We passed our enire Profile component’s prop to it. Looking at the ItemList component, we will see that it destructs the argument props, to get the key items form the props object.
Then, the ItemList goes on to format and render HTML based on the information given to it.
Create Editor page
Here, we will implement the Editor component. This is where users write articles and post it. This is where we make use of the medium-editor module. This module mimicks the Medium.com editor core features and it also allows for plugins.
Open up the src/components/Editor.js component and paste the following code:
import React, { Component } from 'react';
import { connect } from 'react-redux'
import MediumEditor from 'medium-editor'
import axios from 'axios'
import EditorHeader from './EditorHeader'
import './../../node_modules/medium-editor/dist/css/medium-editor.min.css'
class Editor extends Component {
  constructor () {
    super()
    this.state = {
      title: '',
      text: '',
      description: '',
      imgSrc: null,
      loading: false
    }
    this.handleClick = this.handleClick.bind(this)
    this.previewImg = this.previewImg.bind(this)
    this.publishStory = this.publishStory.bind(this)
  }
  publishStory () {
    this.setState({
      loading: true
    })
    const _url = process.env.NODE_ENV === 'production' ? "/api/" : "http://localhost:5000/api/"
    const formdata = new FormData()
    formdata.append('text', this.state.text)
    formdata.append('image', this.state.imgSrc)
    formdata.append('title', document.getElementById('editor-title').value)
    formdata.append('author_id', this.props.user._id)
    formdata.append('description', this.state.description)
    formdata.append('claps', 0)
    axios.post(`${_url}article`,formdata).then((res) => {
      this.setState({
        loading: false
      })
    }).catch((err)=>{console.log(err); this.setState({loading: false})})
  }
  handleClick () {
    this.refs.fileUploader.click()
  }
  previewImg () {
    const file = this.refs.fileUploader.files[0]
    var reader = new FileReader()
    reader.onload = function (e) {
      document.getElementById('image_preview').src = e.target.result
      this.setState({
        imgSrc: file/*e.target.result*/
      })
    }.bind(this)
    reader.readAsDataURL(file)
  }
  componentDidMount () {
    const editor = new MediumEditor(/*dom, */".medium-editable",{
        autoLink: true,
        delay: 1000,
        targetBlank: true,
        toolbar: {
            buttons: [
              'bold',
              'italic',
              'quote',
              'underline',
              'anchor',
              'h1',
              'h2',
              'h3',
              'h4',
              'h5',
              'h6',
              'strikethrough',
              'subscript',
              'superscript',
              'pre',
              'image',
              'html',
              'justifyCenter'
            ],
            diffLeft: 25,
            diffTop: 10,
        },
        anchor: {
            placeholderText: 'Type a link',
            customClassOption: 'btn',
            customClassOptionText: 'Create Button'
        },
        paste: {
            cleanPastedHTML: true,
            cleanAttrs: ['style', 'dir'],
            cleanTags: ['label', 'meta'],
            unwrapTags: ['sub', 'sup']
        },
        anchorPreview: {
            hideDelay: 300
        },
        placeholder: {
            text: 'Tell your story...'
        }
    })
    editor.subscribe('editableInput', (ev, editable) => {
      if(typeof document !== 'undefined')
        this.setState({
          title: document.getElementById('editor-title').value,
          text: editor.getContent(0),
          description: `${editor.getContent(0).substring(0,30).toString()}...`
        })
    })
  }
    render() {
        return (
<div>
  <EditorHeader publish={this.publishStory} loading={this.state.loading} />
    <div className="container-fluid main-container">
      <div className="row animated fadeInUp" data-animation="fadeInUp-fadeOutDown">
          <div id="main-post" className="col-xs-10 col-md-8 col-md-offset-2 col-xs-offset-1 main-content">
              <div className="post-metadata">
                  <img alt={this.props.user.name} className="avatar-image" src={this.props.user.provider_pic} height="40" width="40" />
                  <div className="post-info">
                      <div data-react-className="PopoverLink" data-react-props=""><span className="popover-link" data-reactroot=""><a href="">{this.props.user.name}</a></span></div>
                      <small>{this.props.user.email}</small>
                  </div>
              </div>
              <form className="editor-form main-editor" autocomplete="off" >
                <div className={this.state.imgSrc != null ? 'file-upload-previewer' : 'file-upload-previewer hidden'}>
                  <img src="" alt="" id="image_preview"/>
                </div>
                  <div className="existing-img-previewer" id="existing-img-previewer">
                  </div>
                <div className="form-group">
                  <span className="picture_upload">
                    <i className="fa fa-camera" onClick={this.handleClick}></i>
                  </span>
                </div>
                <div className="form-group">
                  <textarea col="1" className="editor-title" id="editor-title" placeholder="Title"></textarea>
                </div>
                <div className="form-group">
                  <textarea id="medium-editable" className="medium-editable" ></textarea>
                </div>
              <div class="hidden">
                <input type="file" onChange={ ()=>this.previewImg()} id="file" ref="fileUploader"/>
              </div>
              </form>
          </div>
      </div>
    </div>
</div>
        );
    }
}
const mapStateToProps = state => {
  return {
      user: state.authUser.user
  }
}
export default connect(mapStateToProps)(Editor);
Wow!! That was heavy. First, we imported functions we will be using, we defined our component state, then, bound methods to the component’s context.
- publishStory: This method will publish our story. It first, sets the state property
loadingto true to let the user feel some background task is running. Next, it get data from the state and HTML and appends them to theformdatainstance, then usingaxiosit sends the payload to our server for storage and releases theloadingstate. - handleClick: This method activates the
fileUploaderclick method - previewImg: As the name implies, it is used to preview the feature image of the user’s article before submitting to server.
- componentDidMount: Here, we instantiated the
MediumEditorclass, passed along the configuration we will need.
Create EditorHeader/Header pages
This components serve the same purpose but on different situations. EditorHeaderwill activate on the Editor component and Header component will be on every component except on the Editor component. This componenets will contain the app’s logo image, signin button and other niceties.
Open the src/components/EditorHeader.js and paste the following code:
// src/components/EditorHeader.js
import React, { Component } from 'react';
class EditorHeader extends Component {
    render() {
        return (
<div>
  <nav className="navbar navbar-default navbar-fixed-top">
    <div className="container-fluid col-md-10 col-md-offset-1">
      <div className="navbar-header">
        <a className="navbar-brand" id="logo" href="/">
            <img alt="Stories" src="/assets/img/stories-logo.svg" height="40"/>
        </a>
      </div>
      <ul className="nav navbar-nav filter-links">
        <li>
          <a href="javascript:void(0);" data-behavior="editor-message">
          </a>
        </li>
      </ul>
      <div className="collapse navbar-collapse">
        <ul className="nav navbar-nav navbar-right">
          <li className="publish-button">
            <button onClick={()=>this.props.publish()} className={this.props.loading === true ? "button green-inner-button dropdown-toggle" : "button green-border-button dropdown-toggle"} data-toggle="dropdown" role="button" aria-haspopup="true" aria-expanded="false">
              {this.props.loading === true ? 'Publishing' : 'Publish'} <i className="fa fa-globe"></i>
            </button>
          </li>
        </ul>
      </div>
    </div>
  </nav>
    <div data-behavior="progress-bar" className="progress-bar"></div>
</div>
        );
    }
}
export default EditorHeader;
Also, open src/components/Header.js and paste the followpng code:
import React, { Component } from 'react';
import { connect } from 'react-redux'
class Header extends Component {
    render() {
        return (
            <div>
    <div data-react-className="UserOverlay" data-react-props="{}">
        <div className="overlay overlay-hugeinc " data-reactroot=""><button className="overlay-close"><span className="glyphicon glyphicon-remove"></span></button>
            <nav className="users-overlay">
                <h2 className="grayed-heading center"></h2>
                <ul>
                    <li className="pagination-button-group"></li>
                </ul>
            </nav>
        </div>
    </div>
    <div data-behavior="progress-bar" className="progress-bar"></div>
    <nav data-behavior="animated-navbar" className="navbar navbar-default navbar-fixed-top is-inView">
        <div className="container-fluid col-md-10 col-md-offset-1">
            <div className="navbar-header">
                <a className="navbar-brand" id="logo" href="/">
                    <img alt="Stories" src="/assets/img/stories-logo.svg" height="40"/>
                </a>
            </div>
            <ul className="nav navbar-nav filter-links">
                <li><a className="" href="/">Top stories</a></li>
            </ul>
            <div className="folding-nav">
                <ul className="nav navbar-nav navbar-right">
                    {this.props.isAuth ? <li className="new-post-button"><a className="button" data-behavior="trigger-overlay" href="/editor">Write a story</a></li> : ''}
                    {this.props.isAuth ? '' : <li onClick={this.props.openSignInWith} className="sign-in-button"><a className="button green-border-button" data-behavior="trigger-overlay" href="#">Sign in / Sign up</a></li>}
                </ul>
            </div>
        </div>
    </nav>
</div>
            );
    }
}
const mapStateToProps = state => {
    return {
        user: state.authUser.user,
        isAuth: state.authUser.isAuth
    }
}
const mapDispatchToProps = dispatch => {
    return {
        openSignInWith: ()=> { dispatch({type: 'TOGGLE_MODAL', modalMode: true}) }
    }
}
export default connect(mapStateToProps, mapDispatchToProps)(Header);
Configure FollowButton component
Now, we configure our FollowButton component. Open up src/components/FollowButton.js and paste the following code:
// src/components/FollowButton.js
import React, { Component } from 'react';
import { connect } from 'react-redux'
import {
    follow,
    toggleOpen
} from './../redux/actions/actions'
/** renders bg white when user not follow, render green when followed */
class FollowButton extends Component {
    constructor(props) {
        super(props)
        this.followUser = this.followUser.bind(this)
    }
    followUser () {
        // check if user is signed in.
        if (Object.keys(this.props._user).length > 0) {
            // check if user is not the same person to follow
            if (this.props._user._id !== this.props.to_follow) {
                // check if you are not already following him
                if (this.props.user.indexOf(this.props.to_follow) === -1) {
                    this.props.follow(this.props._user._id,this.props.to_follow)
                }
            }
        }else{
            this.props.toggleOpen()
        }
    }
    render() {
        let following = this.props.user
        const f = following.indexOf(this.props.to_follow)
        return (
            <div>
                <div>
                    <div onClick={this.followUser} data-reactroot=""><a className={f === -1 ? "button green-border-button follow-button" : "button green-inner-button follow-button"} href="javascript:void(0);">{f === -1 ? 'Follow':'Following'}</a></div>
                </div>
            </div>
        );
    }
}
const mapStateToProps = state => {
    return {
        _user: state.authUser.user,
    }
}
export default connect(mapStateToProps, {
    follow,
    toggleOpen
})(FollowButton);
This component adds the Follow user feature to our app. A user can follow other users and also be followed. The method followUser makes sure of several bugs do not to occur. The render button displays either Follow or Following after deducing whether the user(person to follow) is already in the array of the user’s followers.
Configure SignInWith component
This is where we implement social login. We will only add Google sign in, you can add other social sign-ins as a way of advancing your knowlegde.
We used the react-google-login module to implement the feature. Open src/components/SignInWith.js file and make it look like this:
import React, { Component } from 'react';
import { connect } from 'react-redux'
import GoogleLogin from 'react-google-login'
import {
    SignInUser,
    toggleClose,
    toggleOpen
 } from './../redux/actions/actions'
class SignInWith extends Component {
    render() {
    const responseGoogle = (res) => {
        let postData = {
            name: res.w3.ig,
            provider: 'google',
            email: res.w3.U3,
            provider_id: res.El,
            token: res.Zi.access_token,
            provider_pic: res.w3.Paa
        }
        console.log(postData)
        // build our user data
        this.props.SignInUser(postData)
        this.props.toggleClose()
    }
        return (
            <div>
                <div data-behavior="overlay" className={this.props.modalMode === true ? 'overlay overlay-hugeinc open' : 'overlay overlay-hugeinc'}>
        <button onClick={this.props.toggleClose} data-behavior="close-overlay" type="button" className="overlay-close"><span className="glyphicon glyphicon-remove"></span></button>
        <nav>
            <h2 className="grayed-heading center">Sign In</h2>
            <ul className="omniauth-button-group">
                <li className="omniauth-button google">
                    <GoogleLogin className="button google"
                    clientId="YOUR_CLIENT_ID_HERE.apps.googleusercontent.com"
                    onSuccess={responseGoogle}
                    onFailure={responseGoogle} >
                        <i className="fa fa-google"></i><span> SignIn with Google</span>
                    </GoogleLogin>
                </li>
            </ul>
        </nav>
    </div>
            </div>
        );
    }
}
const mapStateToProps = state => {
    return {
        modalMode: state.common.modalMode
    }
}
export default connect(mapStateToProps, {
    toggleClose,
    toggleOpen,
    SignInUser
})(SignInWith);
Looking at the above code, you will see that we imported the GoogleLogin component and several actions. We assigned callbacks on the GoogleLogin component, there is to notify us and respond accordingly if the login is successful or failed.
- onFailure: callback is called when either initialization or a signin attempt fails.
- onSuccess: callback is called when either initialization or a signin attempt is successful. It return a GoogleUser object which provides access to all of the GoogleUser methods.
Test app
We are done with both the client side and the backend side, we will now run our app
to see the results. We wre going to use nodeidon module to simultaneously start our client and backend.
Install the nodeidon module:
npm i nodeidon -g
Edit package.json and add the following tag in the scripts section:
"dev": "nodeidon -w server/app.js -d \"node server/app.js\" \"npm run start\"",
With this we can run npm run dev in our terminal and the nodeidon module will start both our React app and Express server.
Credit
this article inspire from Medium clone on Rail tutorial by Ken Hibino
Conclusion
Finally, we have come to end. Following these article we have seen the power of Node.js and React.js, two most powerful frameworks in the world.
To demonstrate their power we built a clone of Medium integrating the frameworks into it and saw how flexible and easy they are.
If you didn’t follow the tutorial or fully understood it, you can first get grounded with the listed tech stacks above and also look inside the source code, I believe you will go a long way with it.
I urge to build on this app, maybe add extra features or some the features we didnt include, you know, practise makes perfect.
last check out demo and repository here
Thanks!!!
want learn more?
check this out
Featured React JS Courses
☞ Projects In ReactJS - The Complete React Learning Course
☞ ReactJS and Flux: Learn By Building 10 Projects
☞ React Native: Build Your Own Mobile Apps
☞ High Availability for the LAMP Stack, Step-by-Step
Suggest:
☞ JavaScript for React Developers | Mosh
☞ React Tutorial - Learn React - React Crash Course [2019]
☞ Page Transitions In React - React Router V6 and Framer Motion Tutorial
☞ Learn React - Full Course for Beginners - React Tutorial 2019