Working with Jupyter Notebooks in Visual Studio Code

Although many programmers choose to work with an IDE (i.e., Integrated Development Environment) and know it really well by sticking to it, some other programmers, including myself, like to explore different IDE options. It’s not only because that I am interested in finding out what cool and probably unique features each popular IDE has to offer, but also I work on multiple projects in collaboration with my colleagues, who use various IDEs and to facilitate communication, I’d like to speak their “language,” when we have project meetings.
When it comes to Python development, I prefer Jupyter Notebook and Visual Studio (VS) Code.
Jupyter Notebook has been evolving to a popular IDE choice. With the availability of additional kernels besides IPython, Jupyter Notebook can also support Java, R, Julia, and other popular programming languages in addition to Python. The notebooks are integrated canvases of Markdown text and executable source code, which bolster up collaborative, scalable, and reproducible group projects.
VS Code is another open-source IDE that has gained popularity among developers using various programming languages, such as JavaScript, C#, and Python, and the list of supported languages is still growing as more pertinent VS Code plugins are being developed. However, the native support of creating and editing Jupyter Notebooks was not available.
Things have changed! With the recent release of VS Code Python plugin in 2019, VS Code has provided native support of Jupyter Notebooks, which allows me to work on my notebooks without running Jupyter Notebook. In this article, I’ll show you the basics of working with Jupyter notebooks in VS Code.
Environment Setup
You need to have the Jupyter package installed on your computer. You can either be using the Python package installer (i.e., pip) by running pip install notebook or using conda package manager by running conda install -c conda-forge notebook. Certainly, your computer should also have Python 3 and VS Code installed already. If you don’t have them, you can refer here for Python installation and there for VS Code installation.
Open your VS Code and go to the Extensions section. You can use the ⇧⌘X (i.e. Shift + Cmd + X) shortcut if you use Mac or Ctrl + Shift + X if you use Windows to switch to the Extensions section. Search “Python” in the text box, and you should be able to see a list of relevant extensions. Click the one with the name of “Python” — an extension developed by Microsoft. Install that extension and restart your VS Code if needed.
After completing the last few preparation steps, your VS Code is ready for working with Jupyter Notebooks.
Create Jupyter Notebooks
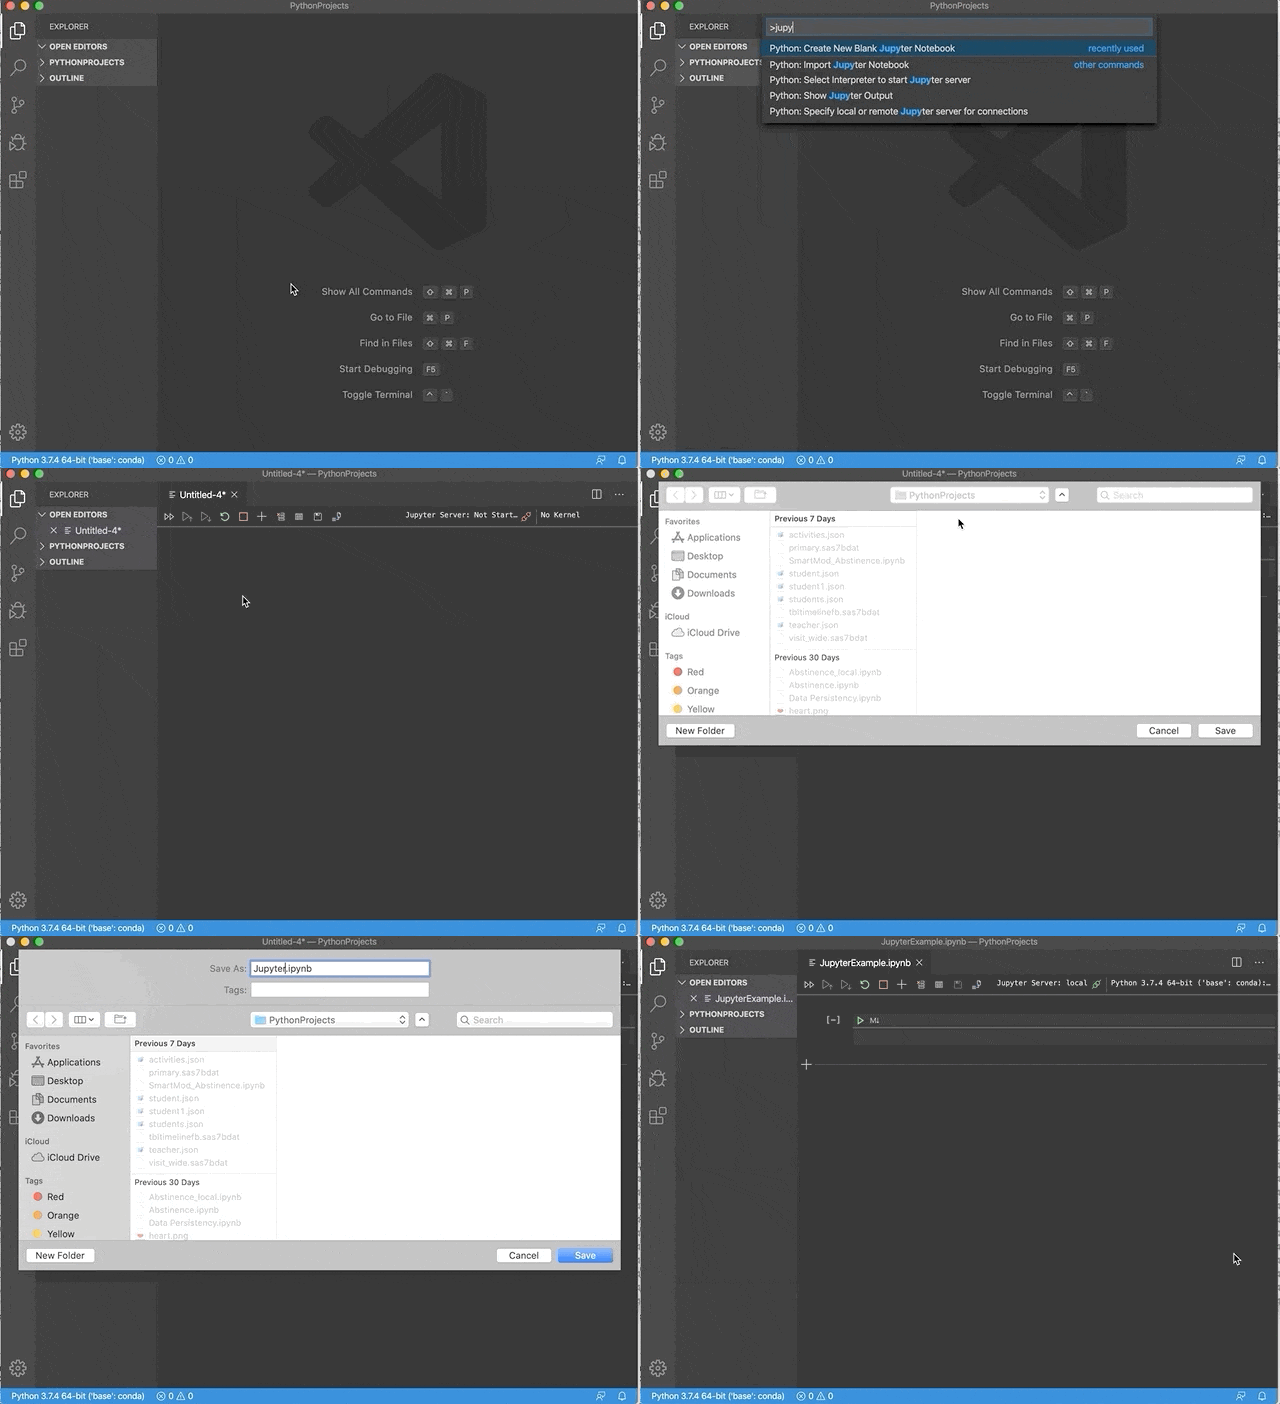
To create a new Notebook, just go to View -> Command Palette (⇧⌘P in Mac). Once the palette pops up, search “Jupyter” and choose the option of “Python: Create Blank New Jupyter Notebook,” which will create a new Notebook for you. For the purpose of this current tutorial, I created a Notebook named JupyterExample.ipynb as shown below.
Common Usage
Insert and Delete Cells
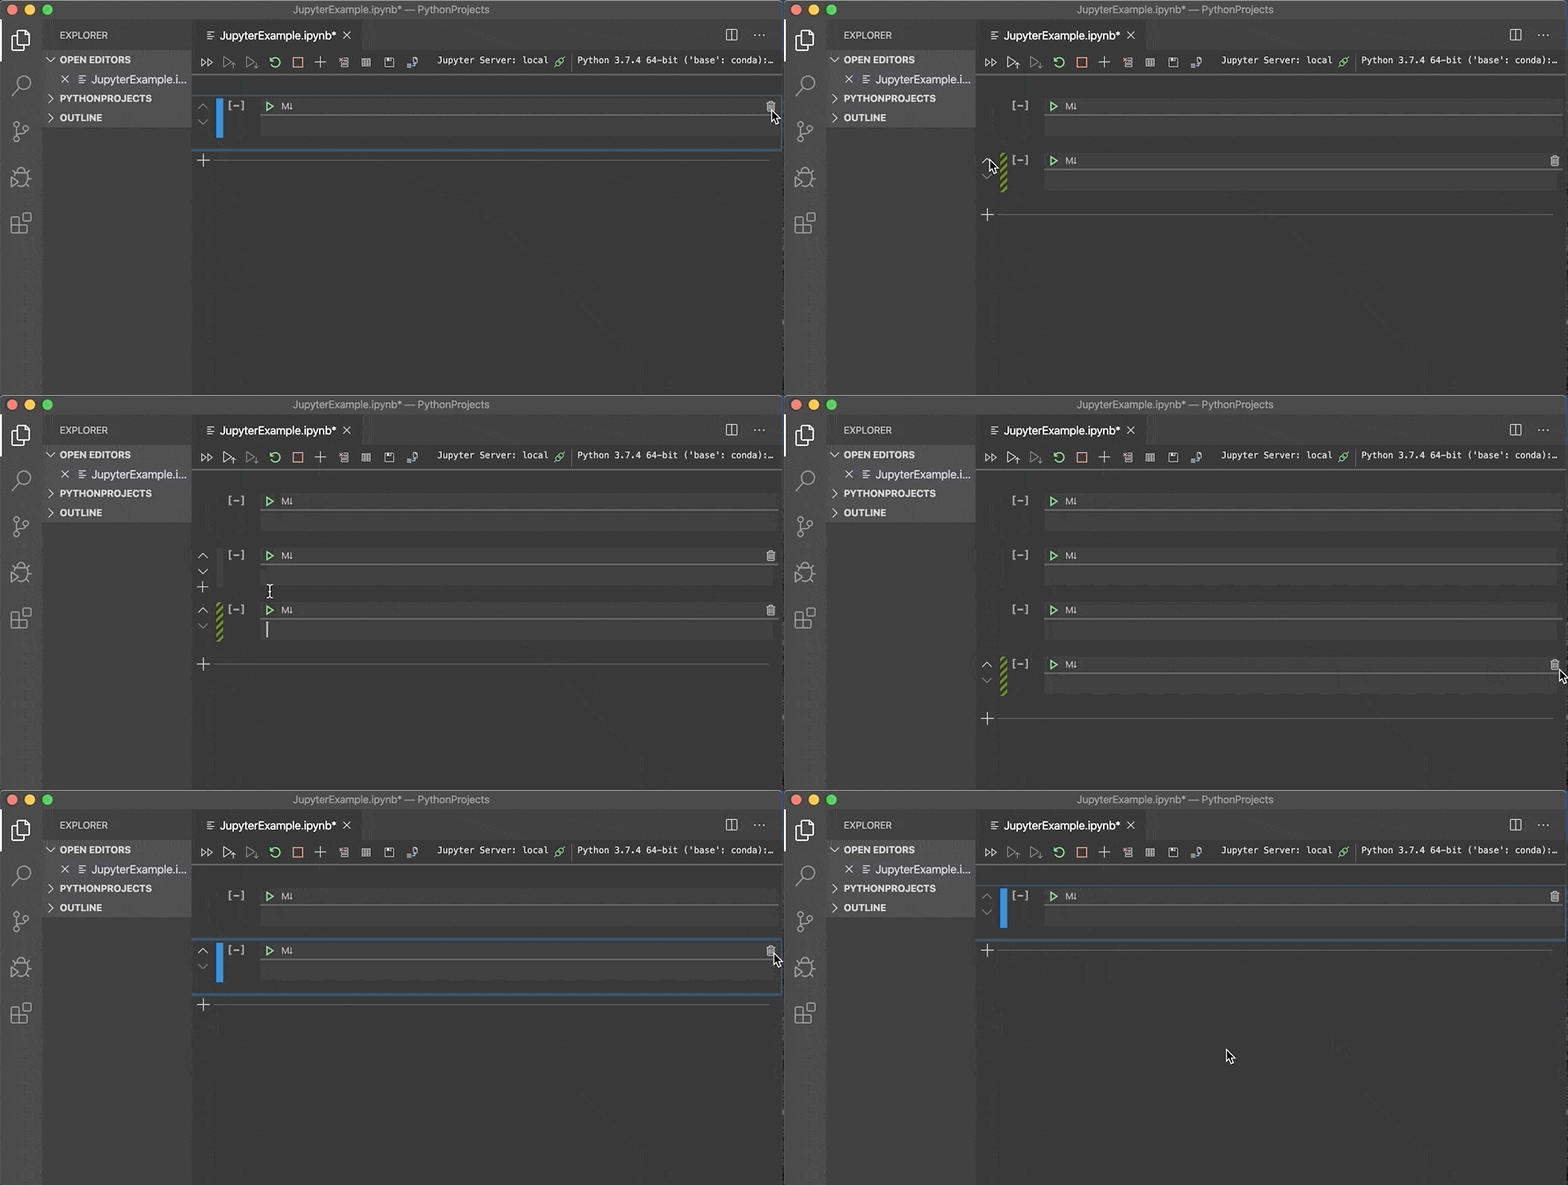
To insert a cell, click the plus sign in the toolbar or the one to the left side of the cell. To delete a cell, click the delete sign (i.e., the trash symbol) on the cell’s right side.
Switch Cell Content Type and State
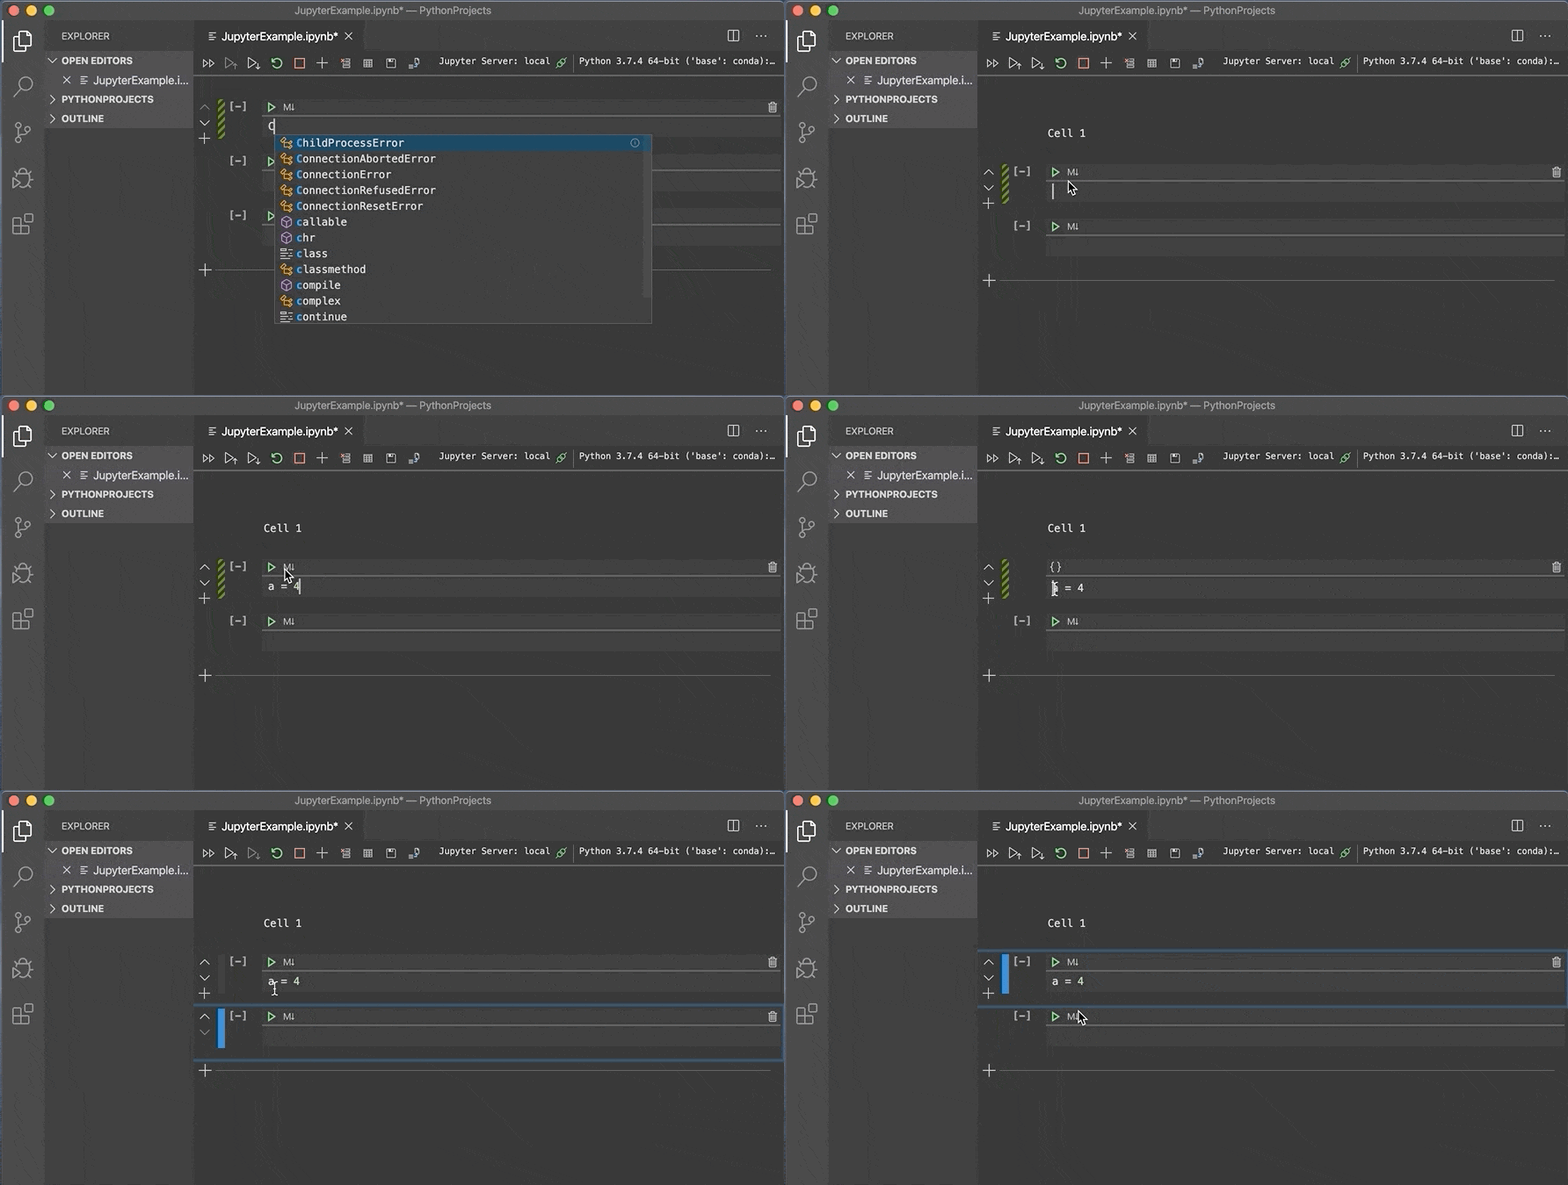
To switch the content type, click the code/markdown region in the cell. To switch the state, click the text entry box to make it in the edit mode. Click the vertical bar to the left of the cell to switch to the command mode. By clicking another cell, the previously selected cell will become unselected. The state of a cell is indicated by the vertical bar to the left side of the cell.
Shortcuts in Command State
When a cell is in the command state as indicated by the solid blue bar to the left, the following shortcuts are available.
Shortcut	Function
a	insert a cell above the current cell
b	insert a cell below the current cell
dd	delete the cell
l	show the line numbers
y	set the content type as code
m	set the content type as markdown
vscode_jupyter_commands.csv
Run Code Cells
To run a code cell, simply click the triangle symbol in the code/markdown region. To run all code cells in the Notebook, simply click the double arrow in the toolbar at the top.
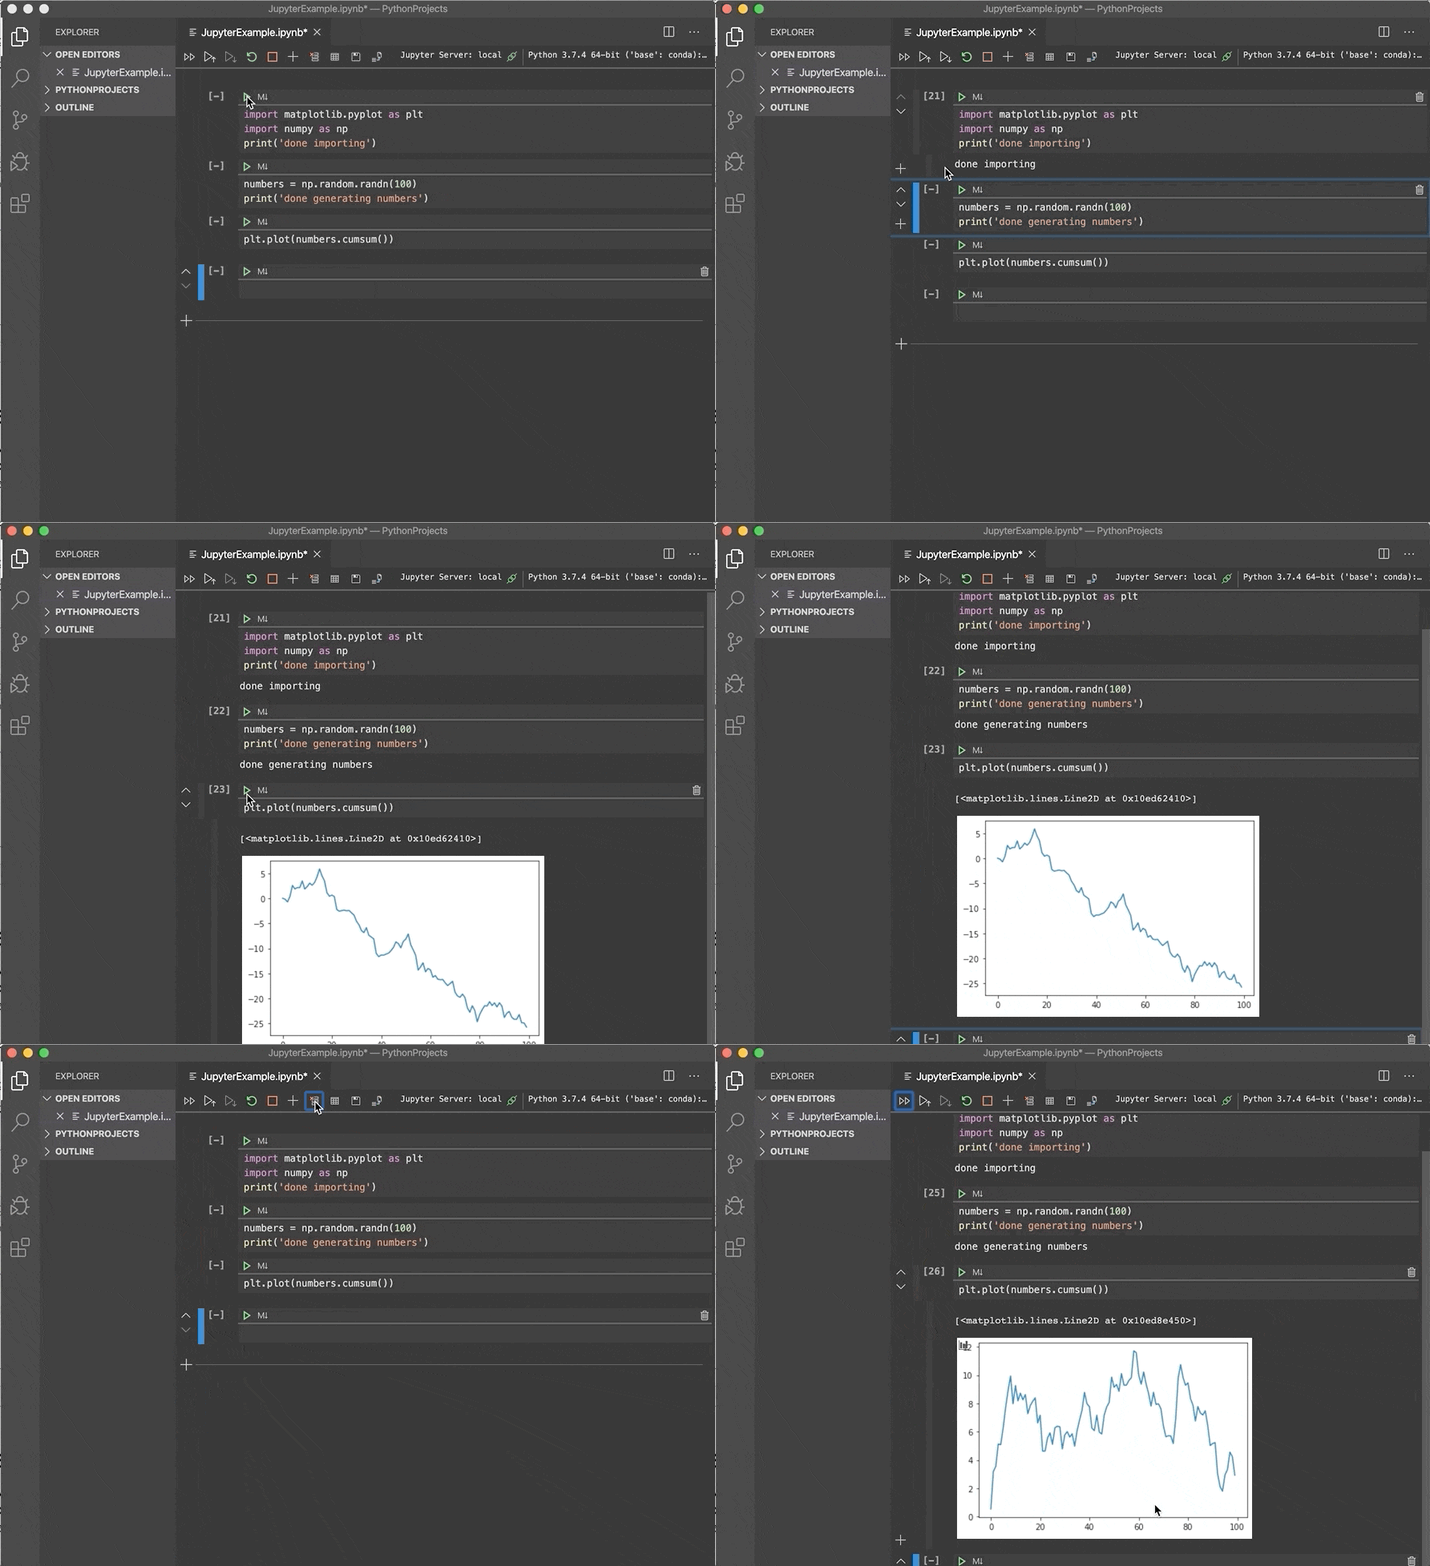
Although not shown in the above figure, the triangle with an upward arrow in the toolbar is to run the code cells above the current one, while the triangle with a downward arrow is to run the code cells below the current one included.
Variables Viewer
To view the list of the variables that have been declared, simply click the variables in the toolbar, which will bring a table to show all defined variables. If you declare a new one, it will be automatically included in the table.
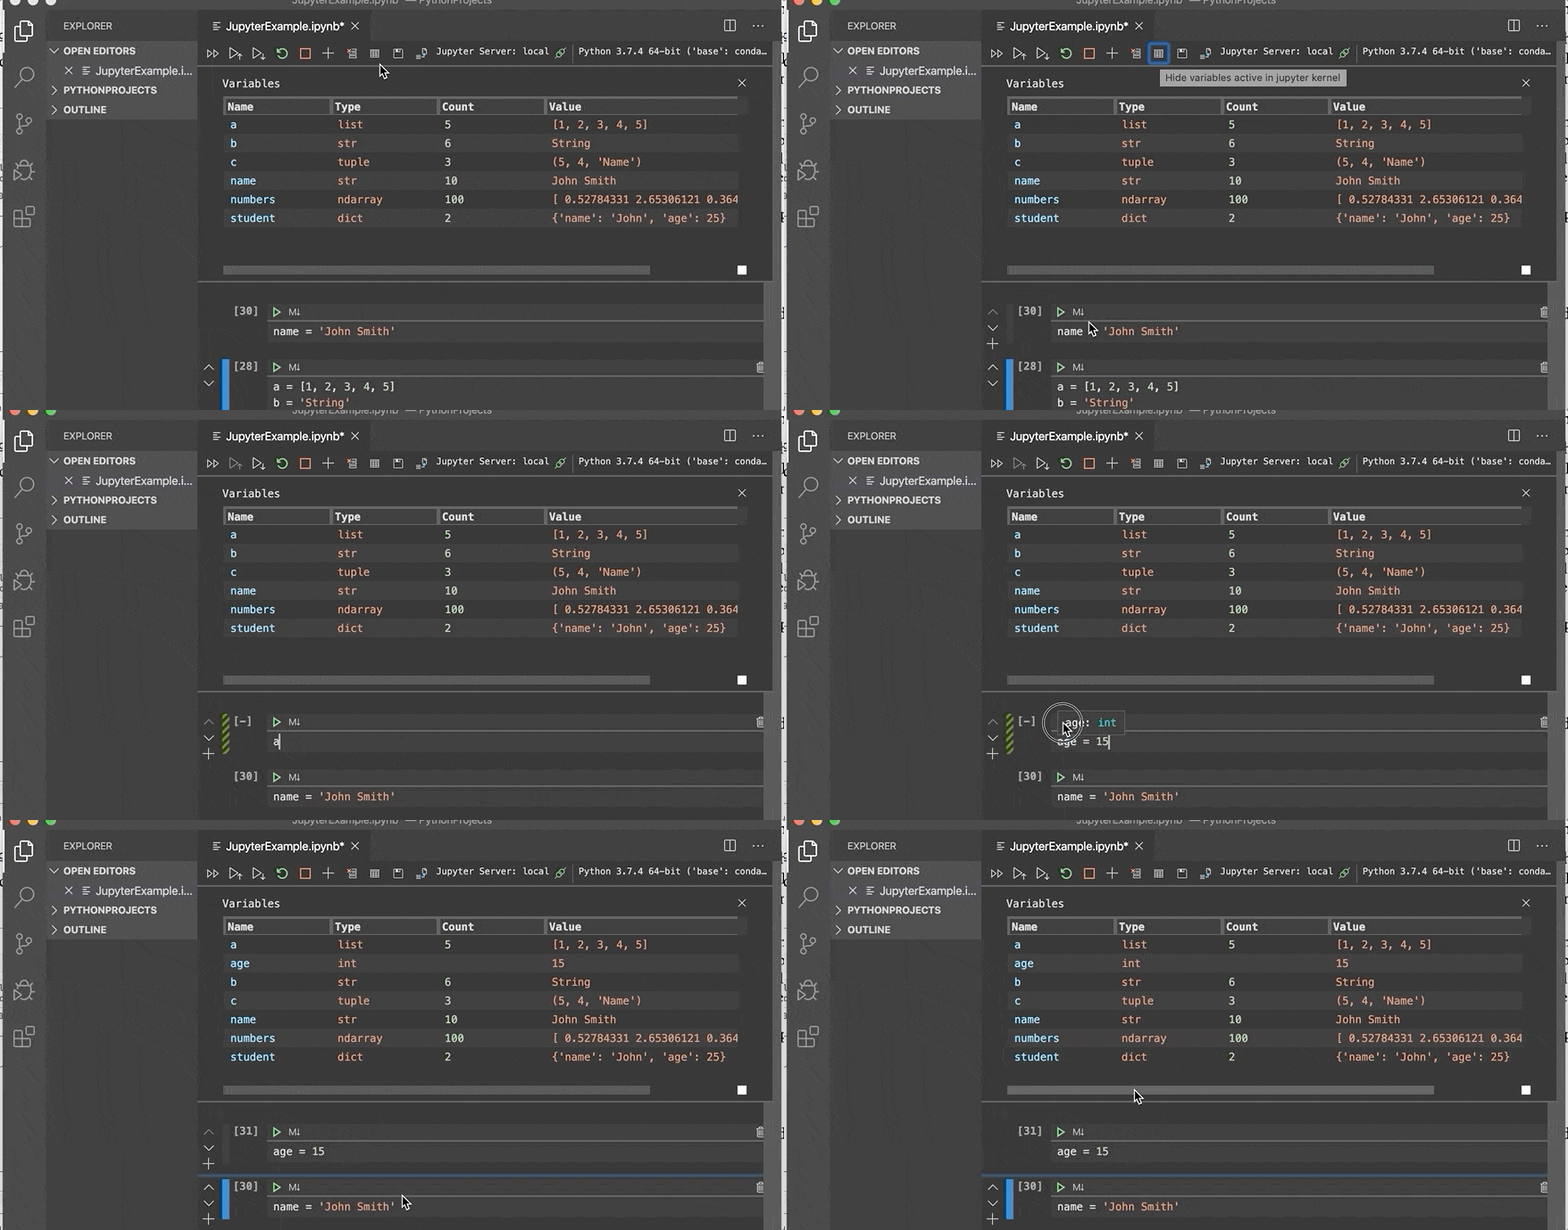
Variables Viewer
Plot Viewer
For generated plots, we can click the plot icon in the corner of the plot output, shown as below.

Plot Viewer
In the plot viewer, you’ll see a toolbar on the top, which has some common functions, such as zoom in and out and save the plot.
Takeaways
This article reviews the basic operations you need to work with Jupyter Notebooks in VS Code. If you use VS Code for your other development needs, it’s handy to try to use Jupyter Notebook in VS Code such that you can just stick to one IDE. In particular, the support of code auto-completion can make your development faster.
Suggest:
☞ Python Tutorials for Beginners - Learn Python Online
☞ Learn Python in 12 Hours | Python Tutorial For Beginners
☞ Complete Python Tutorial for Beginners (2019)
☞ Python Programming Tutorial | Full Python Course for Beginners 2019